Al Stall
![]()
![]()
![]()
![]()
|
Al Stall
|
|
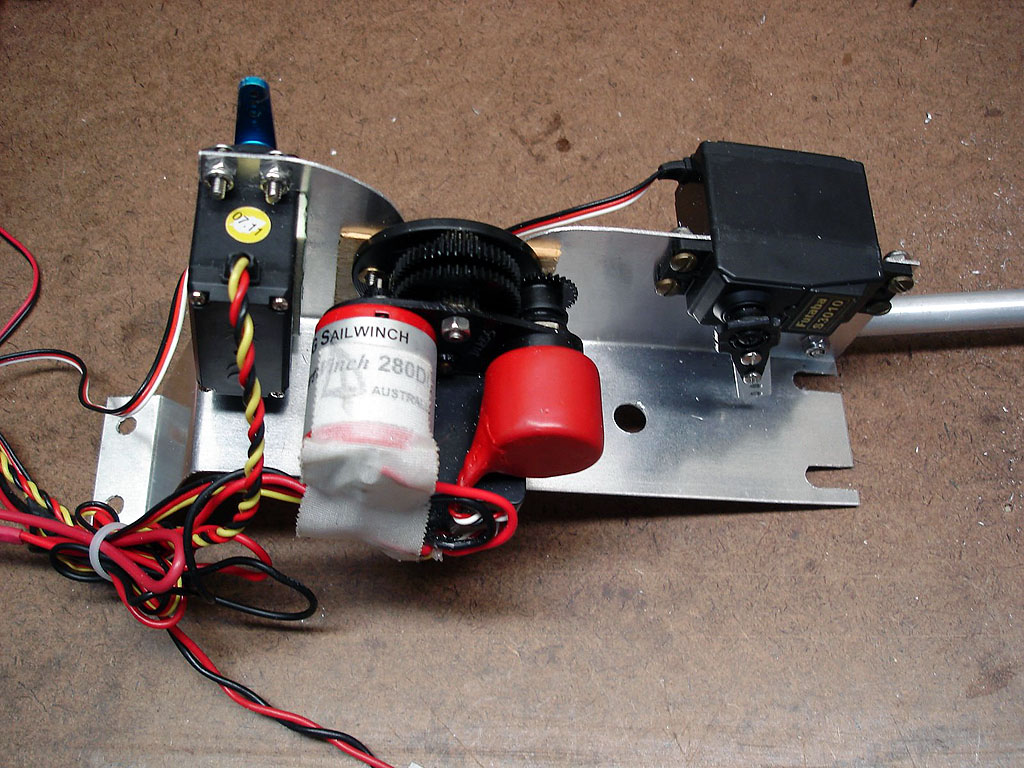
Last update, February 4, 2010 EC12 Equipment Chassis
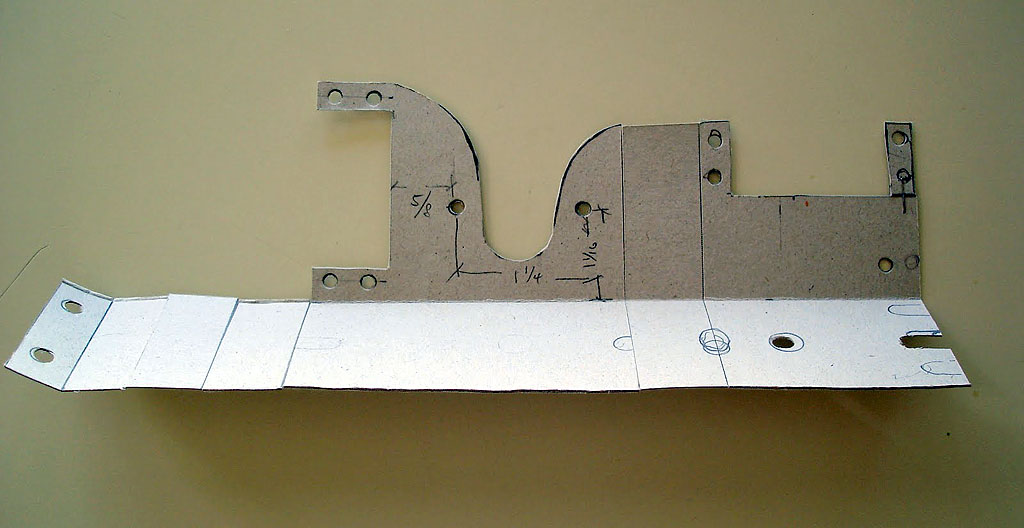
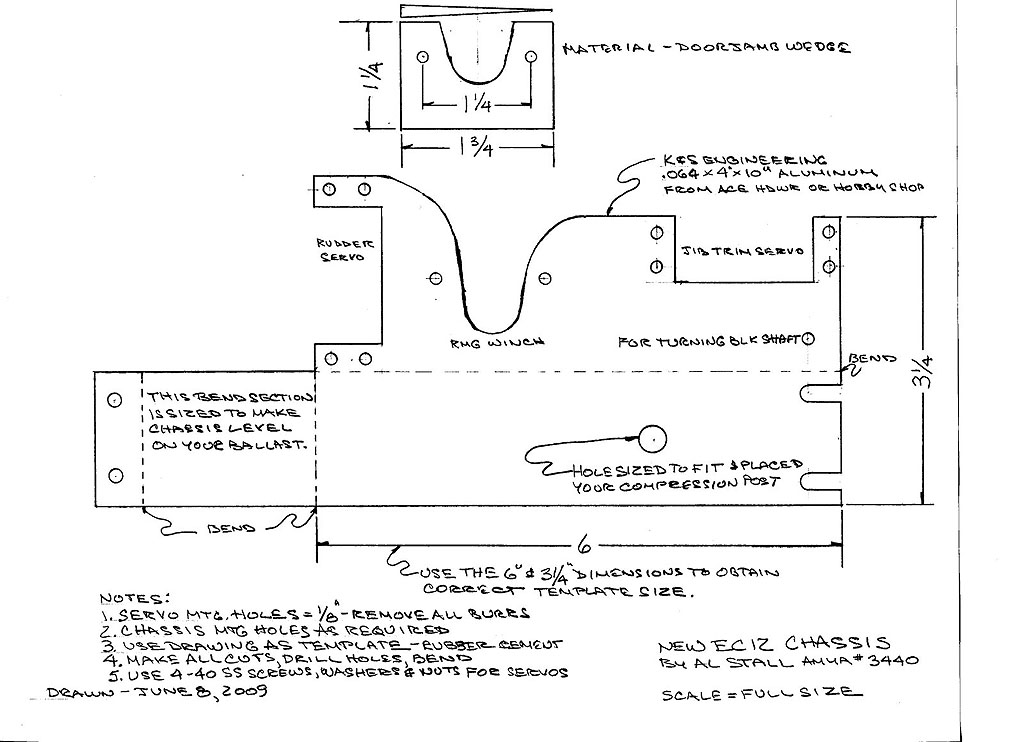
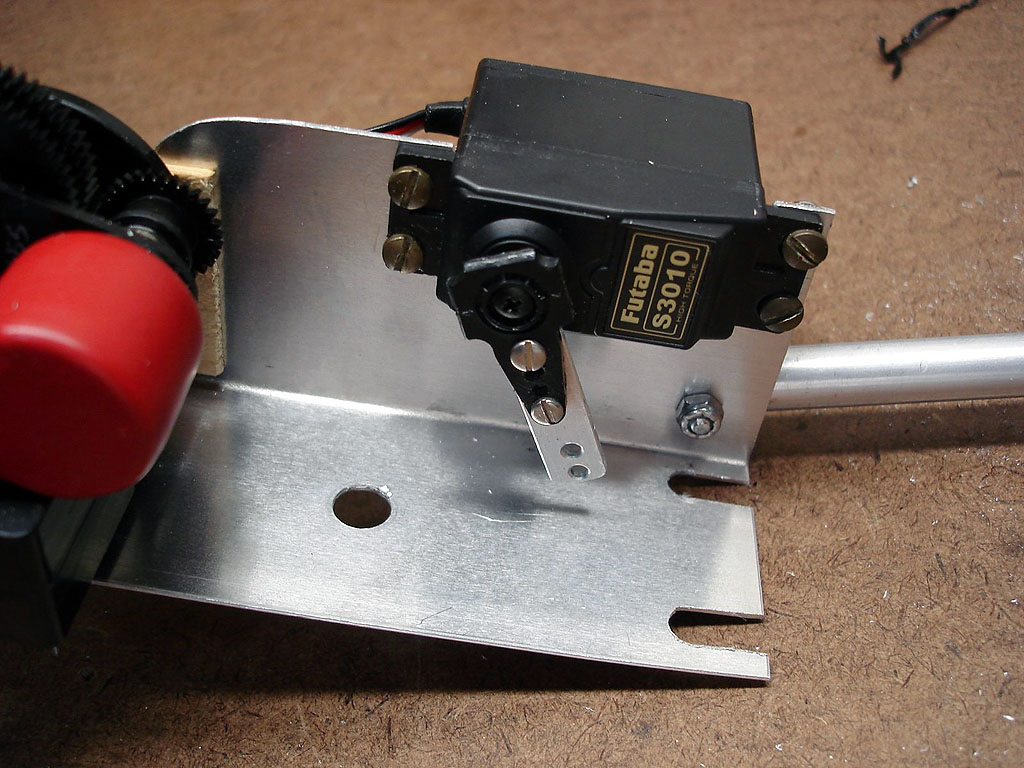
The plan calls for .062 material but I actually fabricated a prototype of .032 aluminum and that is what is shown in the subsequent pictures. I decided to use it and it is presently installed in my EC12. I have not experienced any bending or other problems with it. I originally used the chassis as shown in the EC12 build web site so the mounting slots fit my original holes toward the bow and I drilled new holes in the ballast to accommodate this smaller, more compact design. Servo mounting holes and openings are sized for standard servos such as HS645MG and Futaba 3010. Rubber cement the plan to the aluminum and fabricate.
Make a cardboard template before fabricating the chassis. This is an invaluable aid to insure everything works before you make your chassis. Shirt cardboard is perfect. If this chassis is for a new EC12, simply drill all holes in ballast prior to installing the deck.
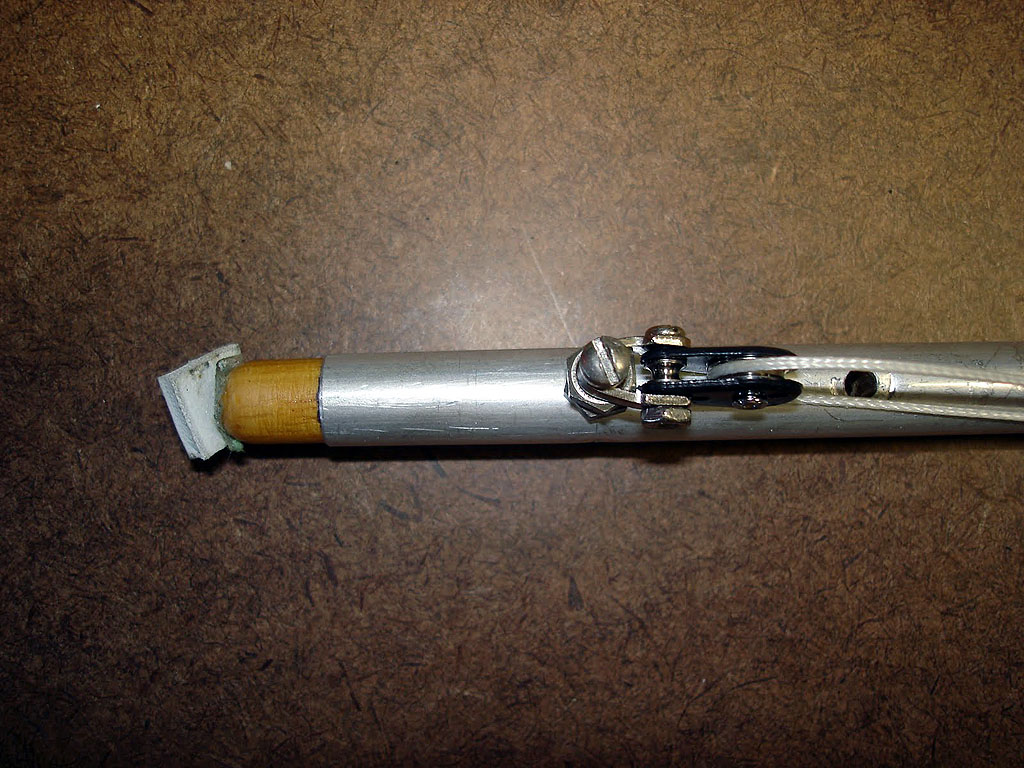
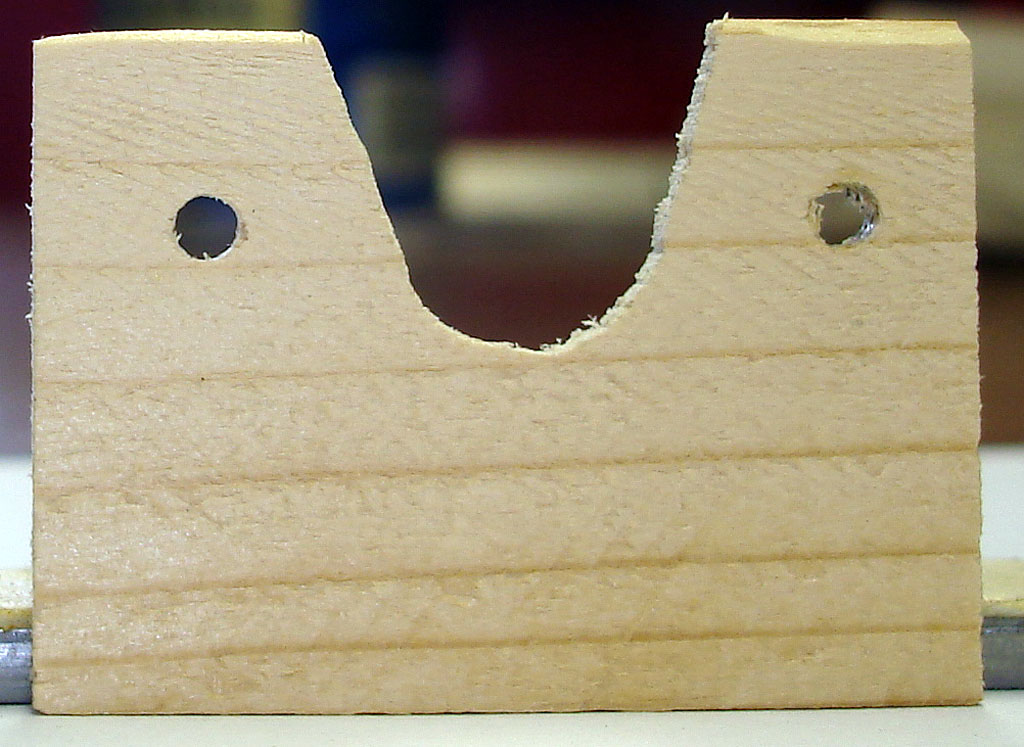
Note that the turning block shaft rests under the ply wedge at the bow. A SS screw, nut, and locknut are used to hold the block loosely in place.
Ignore the extra hole. The dowel is inserted with about 1/4" protruding. A piece of foam is added to provide a cushion where it contacts the hull. You don't have to glue the dowel. The screw holds it in place.
Wedge for the RMG winch is fabricated from door jamb wedge material.
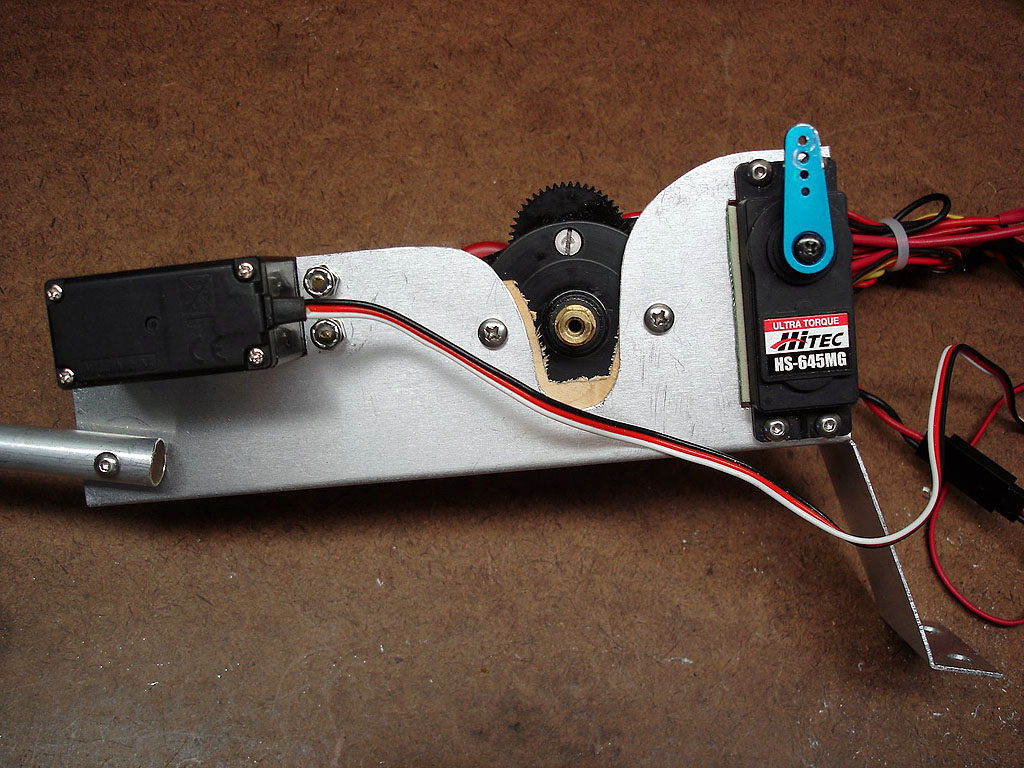
Side View
I always use lock nuts on my servos-no need to use Loctite. Note the shaft is mounted with a SS screw and locknut. The dowel is inserted (it may have to be shaved a bit to fit) and flush with the shaft.
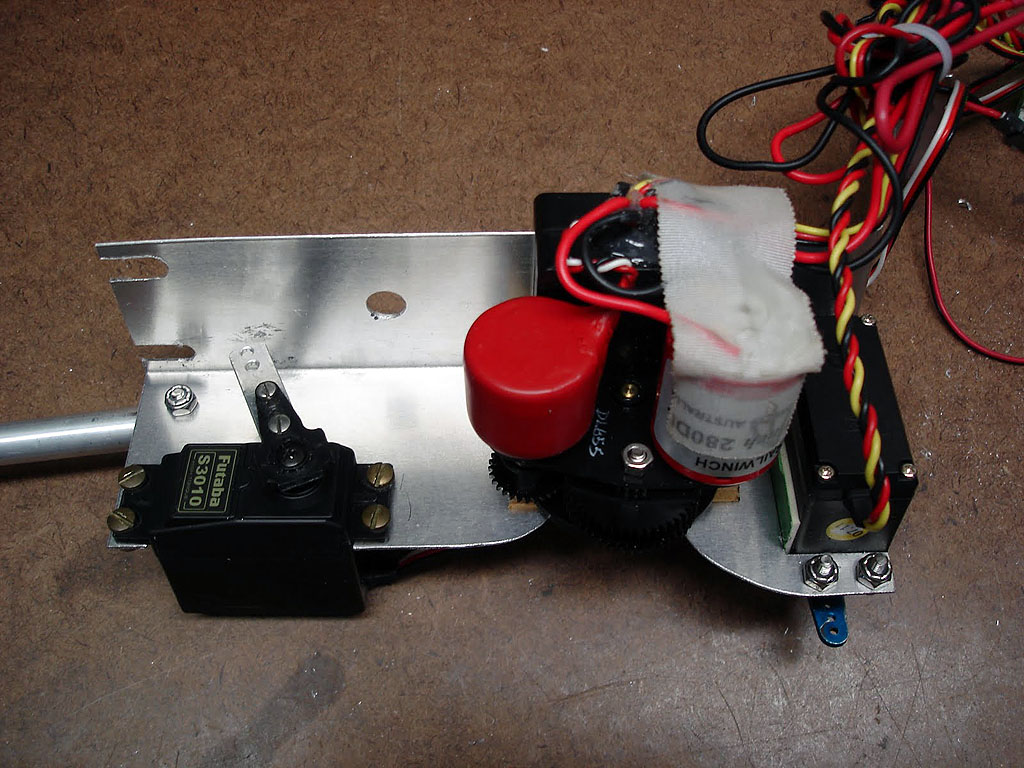
Top view
Photo 9-Shows the shaft mounted to the chassis with a SS screw, flat washer & lock nut. Leave it just loose. Jib trim has an extended arm of .062 aluminum drilled and threaded for 2/56 screws to attach to the servo arm. Two other 3/32 holes drilled and chamfered smooth for trim line.
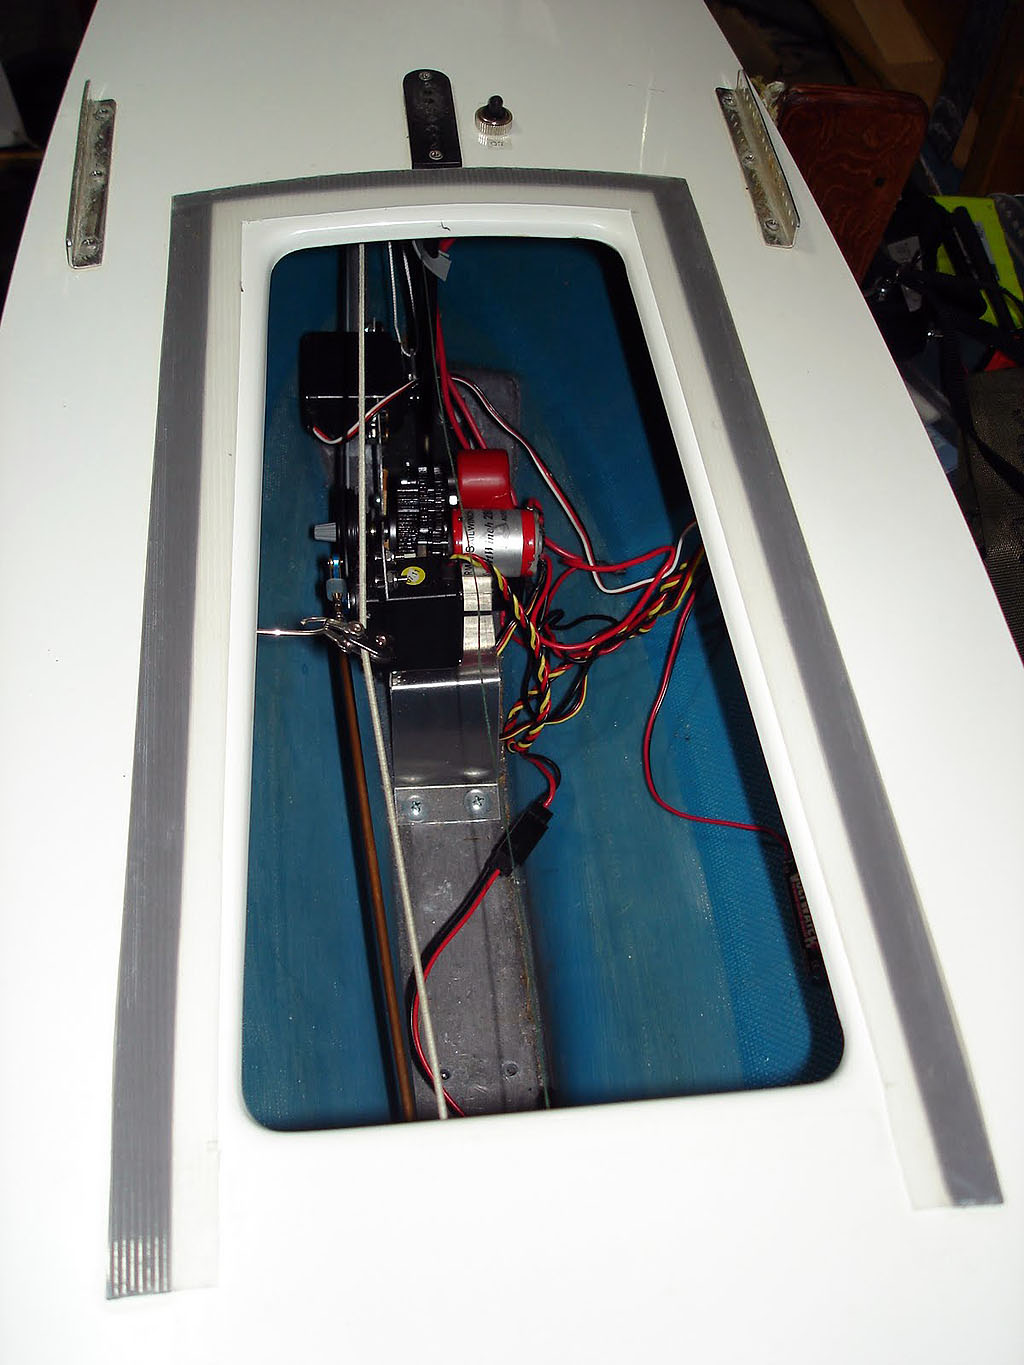
Going from bow to stern, jib rack is most forward, mast step, switch along side mast step, chainplates, mainsheet fairlead, tension elastic fairlead and backstay.
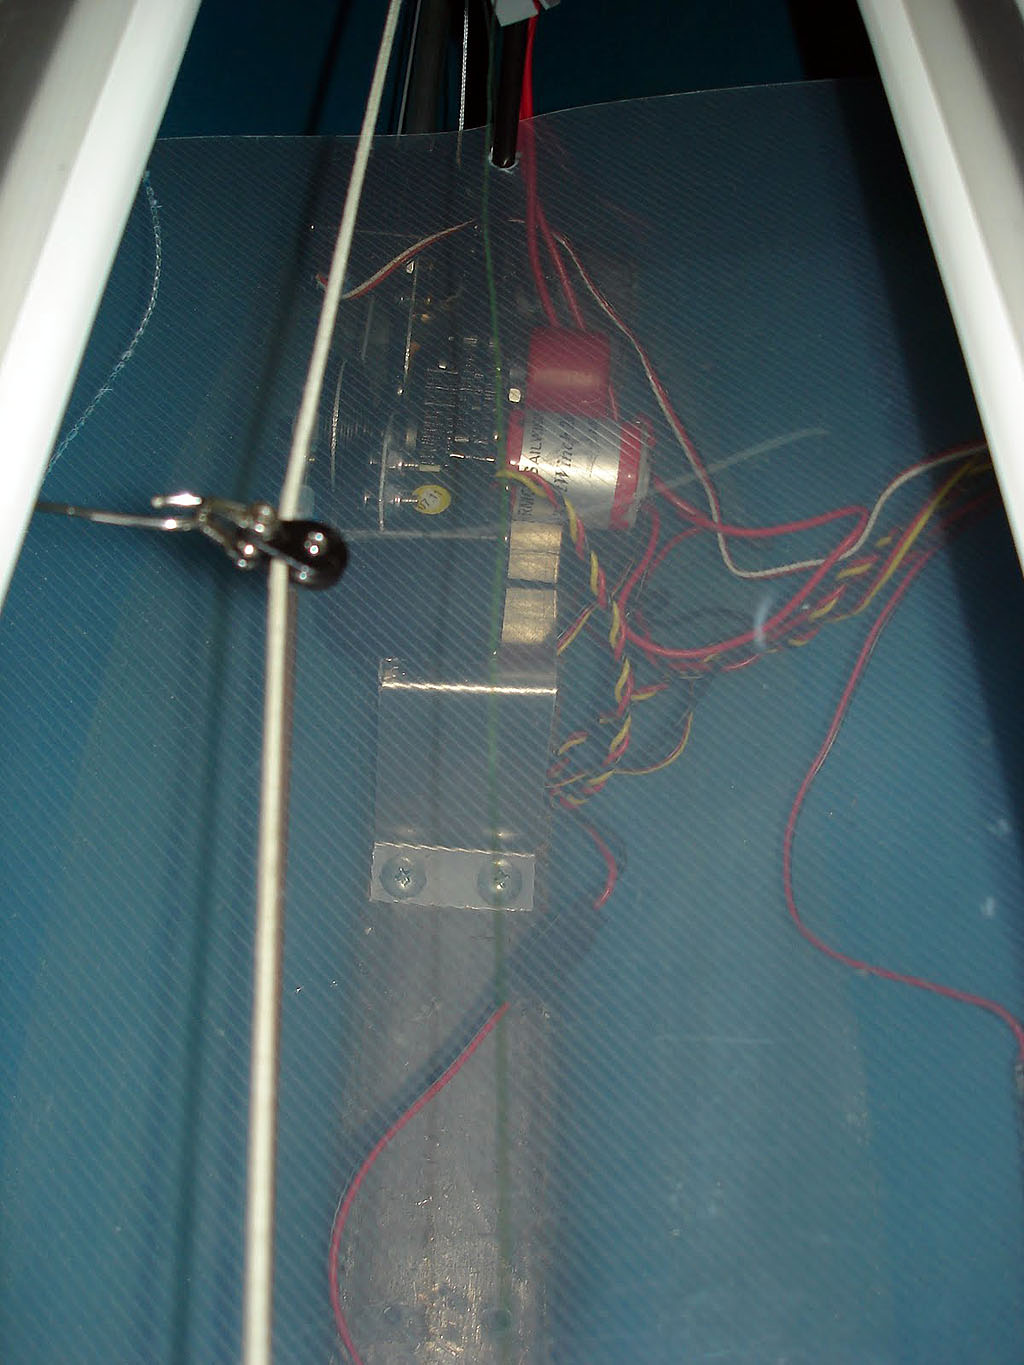
Since the tensioning elastic runs down the center of the boat, I added a block and simple hook to keep the elastic from rubbing on the compression post and the mainsheet fairlead.
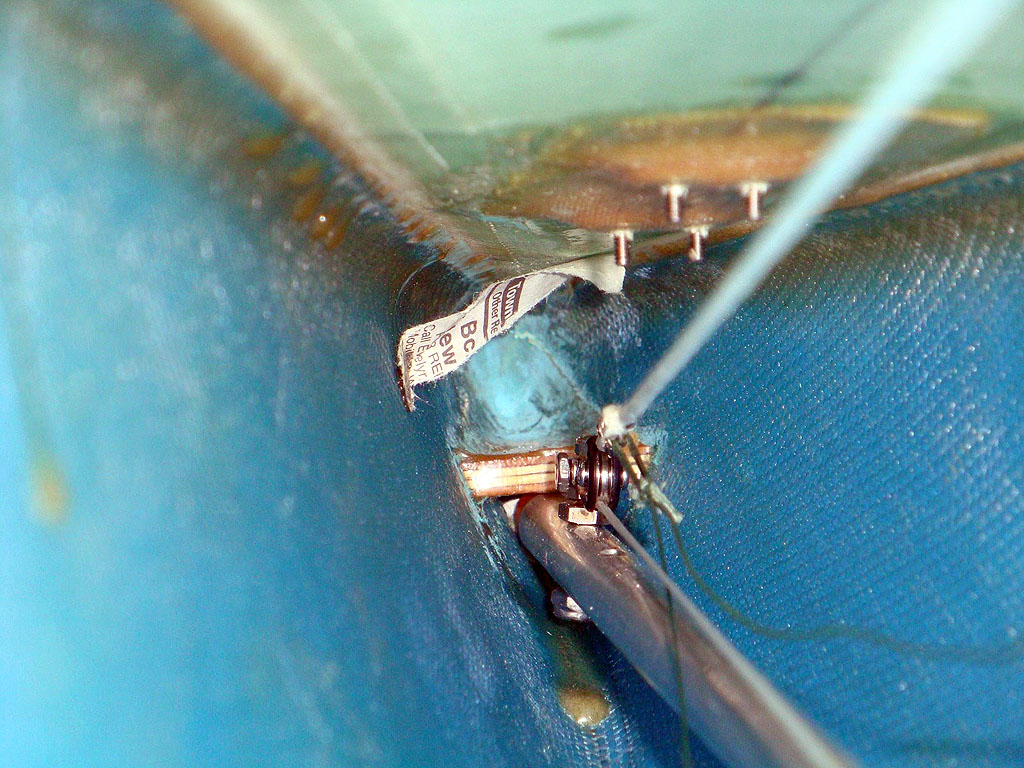
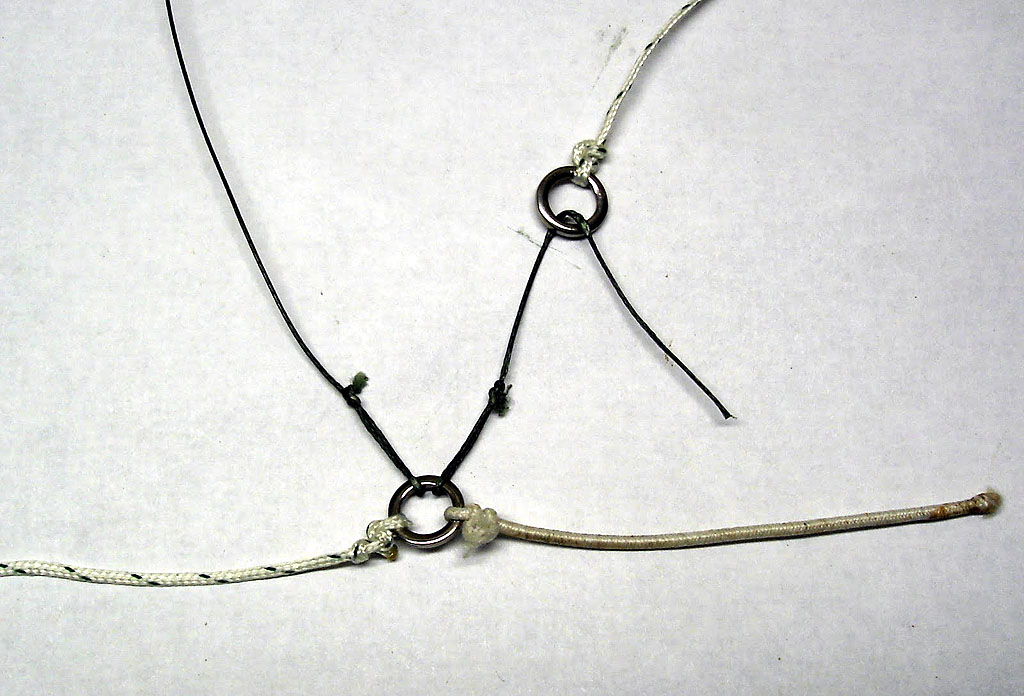
Sheeting system-the Dacron line to the left comes from the winch and is threaded through the top of block attached to the turning shaft at the bow. The line is attached to the solid SS ring which in turn is attached to the 1/16" tensioning elastic cord. The elastic runs lengthwise just under the deck and terminates through a fairlead about 10" aft of the mainsheet fairlead. A simple knot will secure it on top of the deck at the fairlead. The mainsheet and jib sheet are attached to the SS ring as show or knotted tightly to the ring. The jib sheet is threaded through another SS ring which is attached to the jib trim servo.
To prevent the sheet lines from tangling with the gear works, use a vinyl sheet available as part of a presentation folder from an office supply store. Punch a hole and slit to fit around the compression post. It will not move.
Link for the rings:
|