Internal Tang
![]()
![]()
![]()
![]()
![]()
![]()
![]()
|
Internal Tang
|
|
Last update, January 22, 2008
Crimping and Internal Shroud Tangs
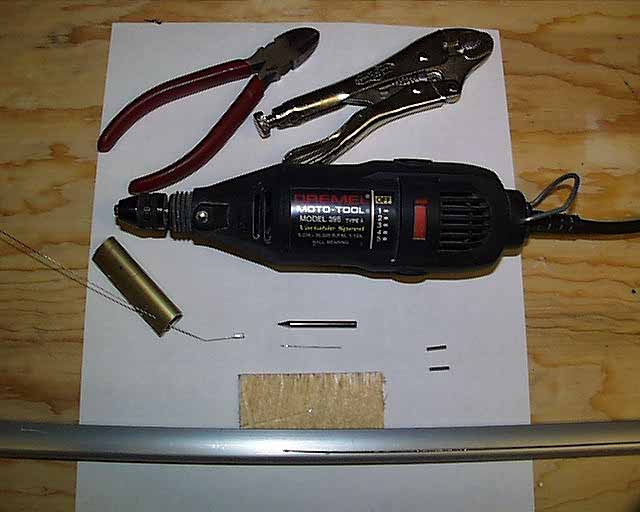
Parts: Mast .018 SS Stranded wire Wire Leader Sleeves, #2 Berkley Fishing
Supplies: Blue Tape
Tools: Small pliers (2) 5" Visegrip pliers Side Cutters Dremel Dremel #9909 cutter bit #73 mini drill bit, several would be good
Commentary It is not for one builder to state a technique or process better than another. Like here all have approached R&D to specifics in their ways and dealt with the results. The tying off of wire cabling on this site has been specific to the Classic Rig and remains so with that rig. The introduction of the Vector Rig opens other thoughts and offered parts that have come into play and are now explored for their application to the EC12 requirements in cabling.
The size of the usable area inside the Groovy mast is less than the Goldspar. The general process of tying wires inside this mast has been developed at SailSetc in the UK for models other than ours. The primary building concern for internal tangs has been the mast exit cutting the shroud wire. For the Groovy mast this was addressed by the use a 5 mm ball between the wall of the mast and the crimped sleeve that would hold the wire against the obvious pulling pressures. SS flat wire is used for the shroud and brass sleeves 8 mm long are the terminal after the ball.
Testing for the EC12 has shown that two crimped sleeves are needed to prevent the wire from slipping loose. This makes the internal tang 21 mm long, about 13/16". When two shrouds are forced into the same space abeam each other it can be visualized that the mast cavity is blocked. It was this view that prompted an afternoon of R&D to mitigate this using the new parts if various different ways. First, all tying of the tang less than using two sleeves failed with pressure in excess of 20 pounds. Locking and interlocking of the wire was to no avail. Secondly, to obtain the test strength using the ball to address the cutting concerns, more room in the cavity was never achieved.
It is not to say it cannot be done. But if it were accomplished and a shroud was severed in some way, like in a collision, the mast would have to be rebuilt. The alternative would be to overlay an external tang mount on the mast. Further attempt was abandoned along this process.
Preparing and Crimping an Internal Tang This is covered in the Classic Rig section but again here in detail on the menu bar. This is not new or developed here. It comes from the Manual, reports from good builders and experience in the field. The solution for wire cutting at the mast when under pressure was to use a small hole, a very small hole and drilled at an angle the wire will want to trace from the hole to the chainplate attachment. You have seen this before but lets go over it again in detail.
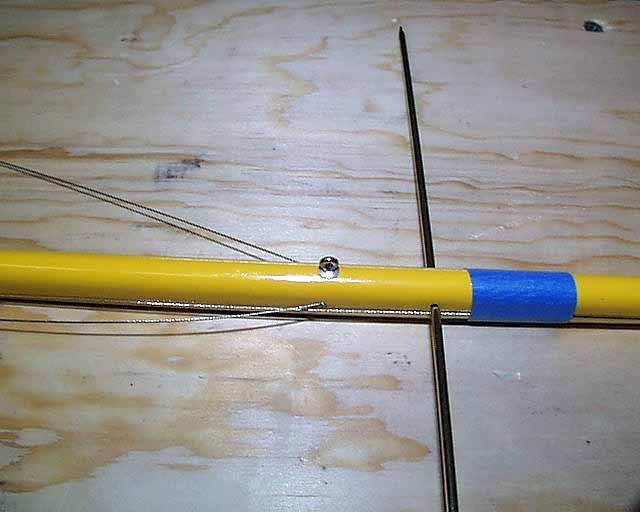
Tang: If you are not of the salt and sailing, a tang is a hard mounting point on the mast for cable or line. An example is shown here on a B rig. To reduce aerodynamic drag on the rig aloft the shroud is passed through the mast and terminated inside. This is not a hard mount but is called a "Tang" because of the function. This tang will be a blocking process that is attached to the end of the wire inside the mast.
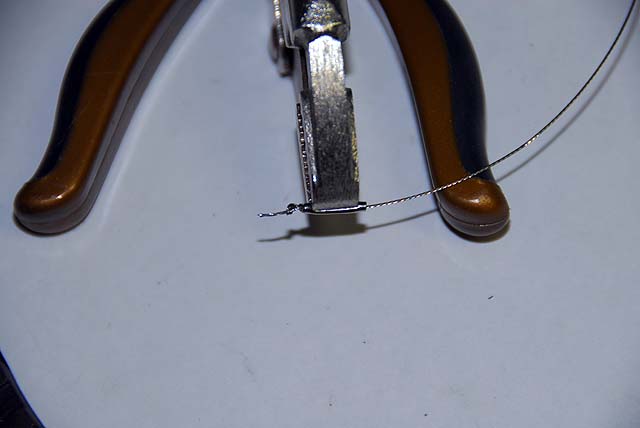
In travels you will see different tools and techniques to install a shroud to an internal tang. Some use professional crimpers while other use a good set of pliers or a nibbler with the cutting jaws filed dull. You can deal with that. Here we use a 5" Vicegrip and the #2 Berkley connector sleeve for wire fishing leaders. The jaws of the pliers will fit between the ends of the sleeve so that when crimped the ends will not be crushed. This touch reduces pressure on the wire where it can be cut by the mast or the sleeve. Shrouds are of .018 SS stranded wire. That is it.
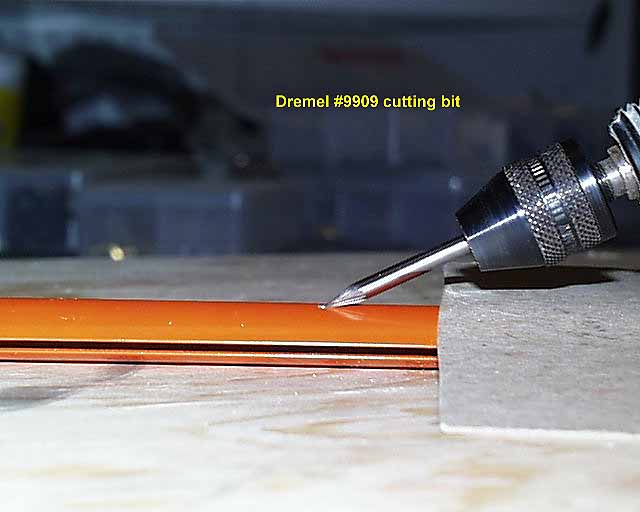
The mapping and marking of a mast identifies where things will go. The shroud wire tang points are marked and we will begin by preparing a very small hole for the wire entry into the mast. Tape the mast below the mark to prevent marring the mast by the rotation of the Dremel chuck. A piece of tablet cardboard will do too. The #9909 cutter bit has a very sharp point and angled blades. The process is to carefully touch the mark with the point of the cutter until you have some purchase so the bit will not fly off the mark during use. Then carefully lower the angle to cut a small trough but not to pass through the wall of the mast. This is very detail stuff but what you want to achieve here while scoring the trough is create a tiny place that the #73 drill can stop against to drill the hole. It does not take much. Work very slowly so it will look clean when finished.
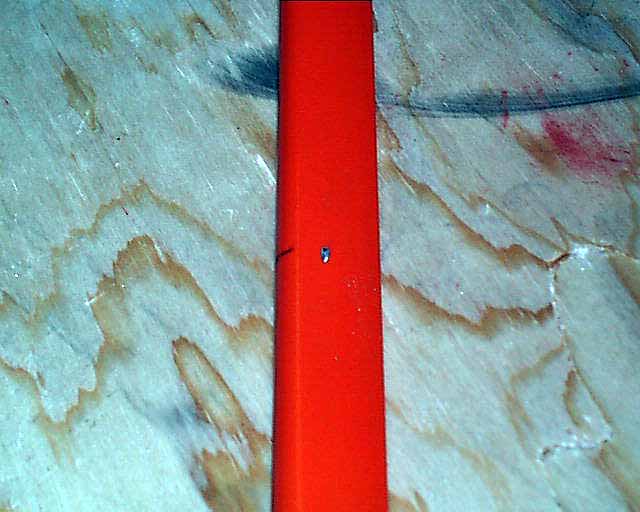
Angle the drill bit more steeply for it to dig in. Then lower the angle as much as possible till if penetrates the mast wall. Then bend the bit down just a bit to feather the hole for deburring.
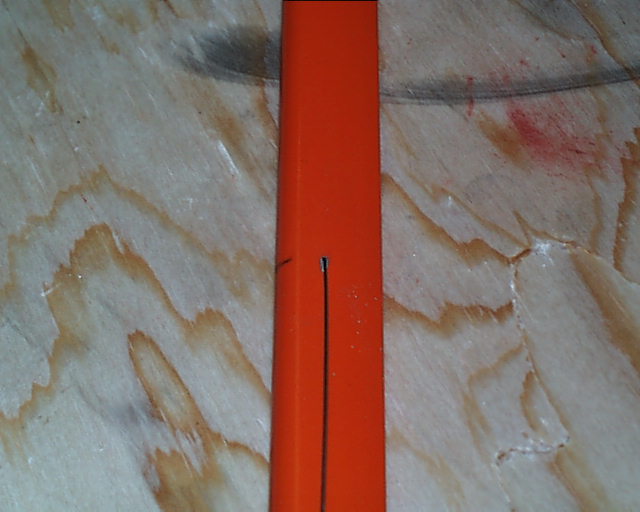
To test the job feed a piece of wire into the hole, hold it at angle toward the imagined chainplate and you should feel very little binding of the wire when you move it in and out.
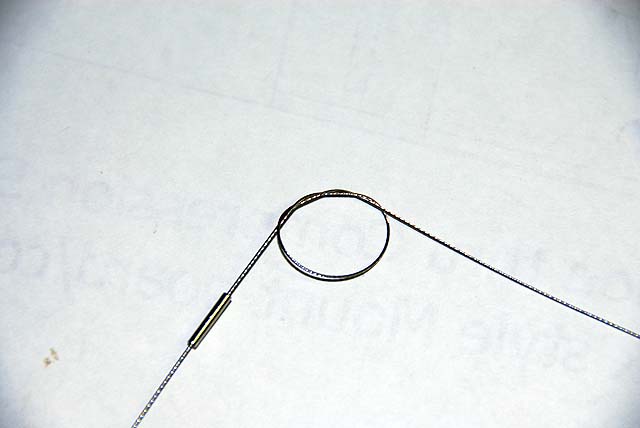
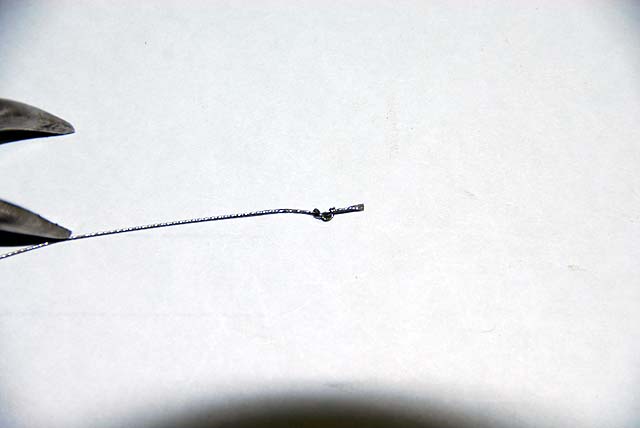
Feed wire into the hole and out the top of the mast. Put on a sleeve. Tie the end of the wire with a figure eight knot and draw it tight with two small pliers. Cut the tag off but leave a little so it will not unravel under pressure. Slide the sleeve up to the knot and with the jaws in the center crimp the sleeve. Remember, try not to crush the ends.
Pull the tang down into the mast and have a sense where it should stop. If it hangs up before that, loosen a bit and twirl it and pull again. When you get to the hole cut of the remaining wire with enough left to do your work at the deck with the connectors.
When tension on the shroud is increase during the installation of the connectors is when one will break from a cut. Even after this a good rattle could break one. If nothing happens you are likely not to loose one unless you hit something.
You'll like it! |