Crate
![]()
![]()
![]()
![]()
![]()
![]()
![]()
![]()
![]()
![]()
|
Crate
|
|
Last update, December 14, 2002 This is optional equipment…
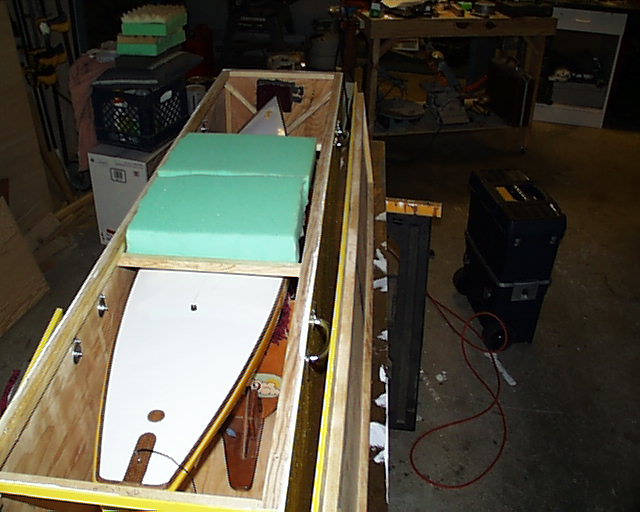
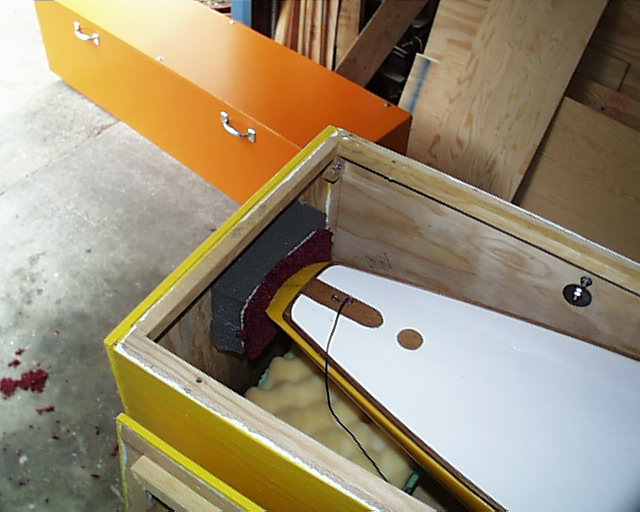
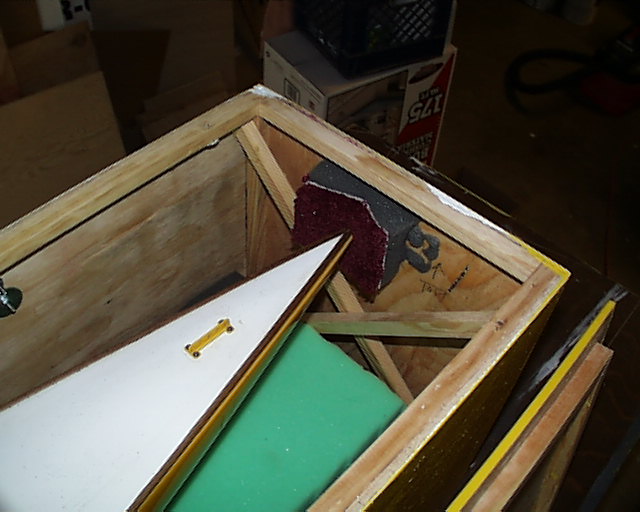
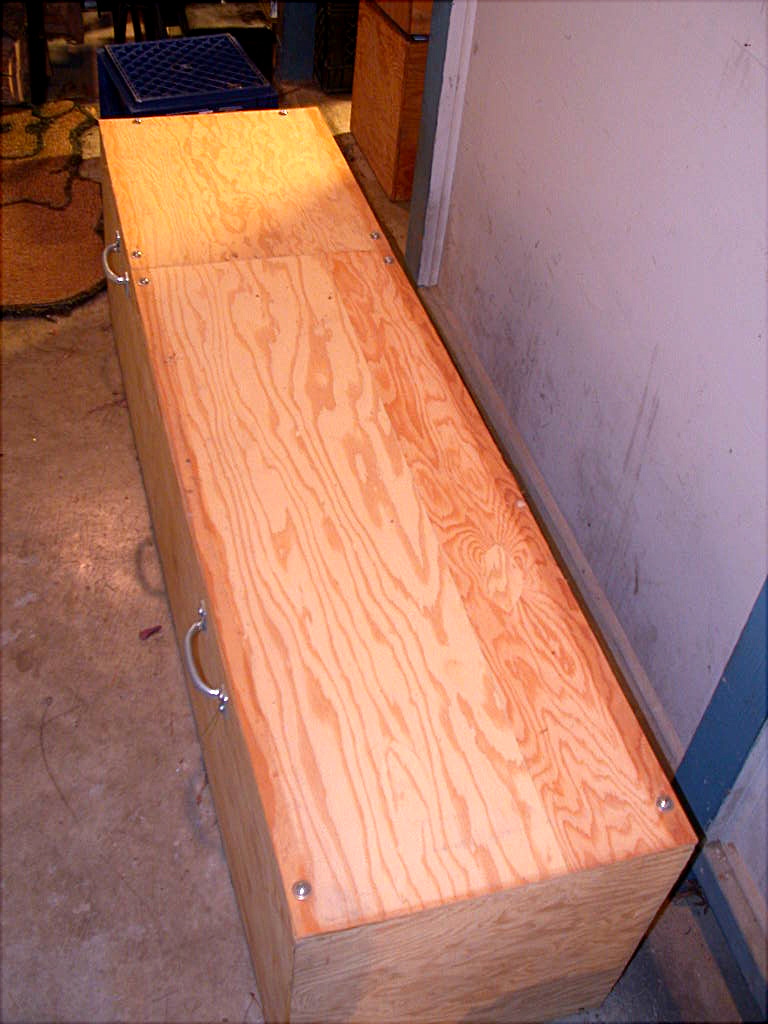
1993 Mercury Villager J Class Shamrock Building Site Storage or Shipping Crate This crate was designed to cover different requirements; shipping across the country, storage at home and secure transport in a SUV or truck. It is to heavy for airline shipping. Whatever your needs, it is easily built within a few days. This is the second generation design, which offers greater crush protection, is lighter and easier to build. The technique was monocoque construction of skin over frame. There are a lot of cradles in the field but most will fit this design if only needing a bit of shaving here and there on the cradle. The cradle does needs to have the keel low to the base so the height of it all will fit inside the crate. The inside dimensions are 13-1/2" side and 14-1/4" tall. The boat, in its cradle, would then be locked at the sides. Pads at the bow an stern protect the ends. The top of the crate is compressed over foam pieces on the central deck for commercial shipping only. The boat should not be stored with the pressure of this foam. Functionality is to remove the boat from the crate at the stern end.
The photos show the construction technique and not the entire procedure. Some older photos are used to show function and storage of the boat. To avoid duplicity some photos are also from the J Boat project, as the crate construction is identical and J and EC12 crates were built side by side.
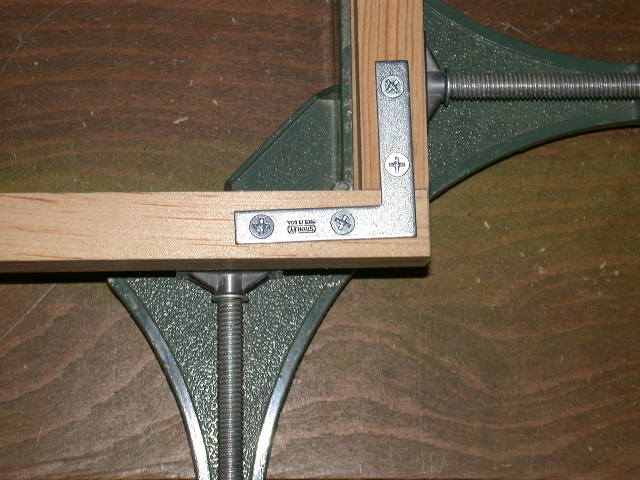
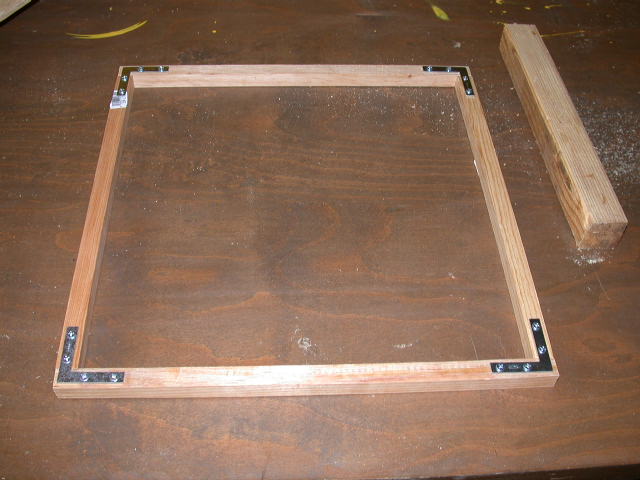
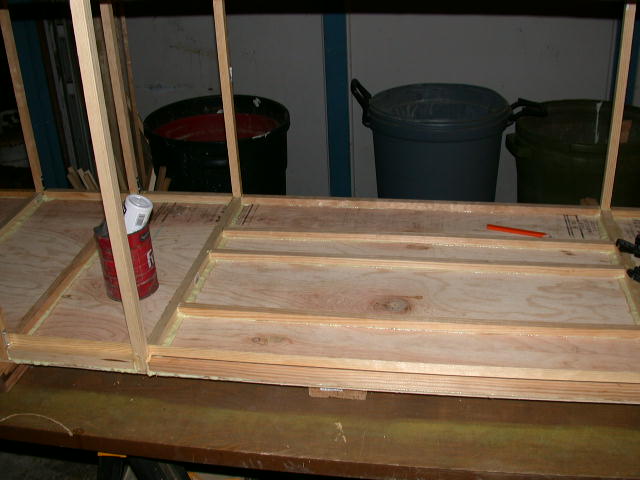
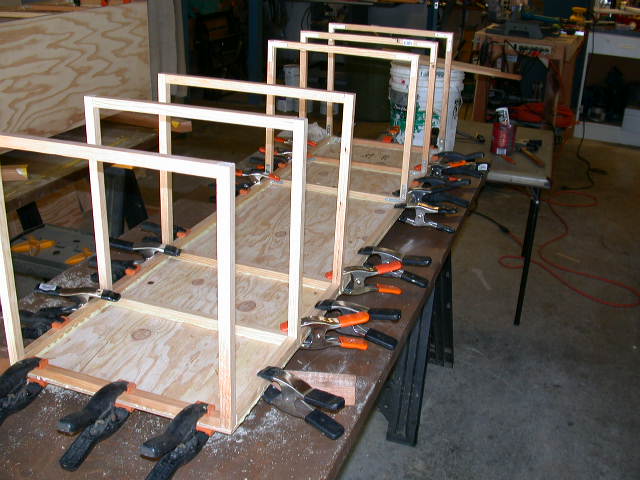
Frames The frames are made of 11/16” square stock. The top and bottom pieces are 15-1/2”. Make 12 pieces. The sidepieces are 14-1/2” and will fit inside the top and bottom ones. Make 12 pieces. The frame is secured with metal right angle braces and screws at all corners. A corner vise was used to insure a square fit when installing the braces. This will make six frames. The position of the frames will be flush with the bow then on center at 10, 19, 41, 51 inches and flush at the stern.
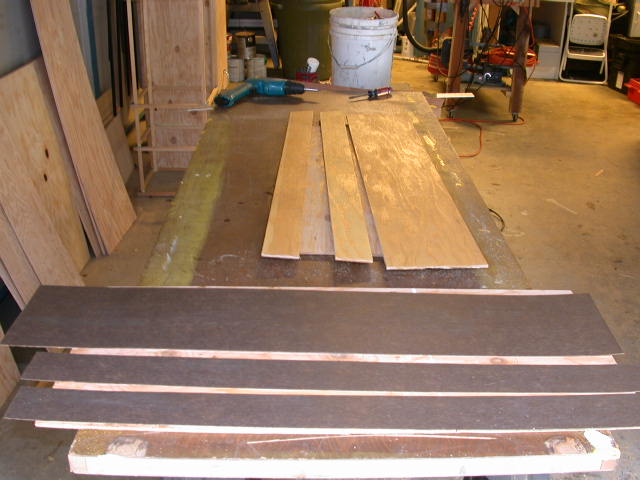
Note: If you cannot get 11/16” square stock but maybe 3/4 or 7/8”, you will need to add length to the 15-1/2” top and bottom skin pieces accordingly. This is to maintain the inside width for the boat and cradle. The sidepieces are okay as stated. Make one frame so that you can determine exactly what your top and bottom skins will be. Remember these skins overlap the sides so they will be 1/2” greater than the top and bottom frame. You will need to make note of this for not only cutting the side skins but the end pieces as well. Skins 2 sheets 1/4” ply was used sanded on one side. Cut two sides at 15-7/8 x 61”. The bottom is 16-1/16 x 61” and will overlap the sides, cut one. Save the remainder for the end pieces. Cut one more 16/1/16” wide piece but leave it the full 96" length. This will be the top. The extra 1/16" in width is because 1/4" ply is more like 5/32.
Parts:
Tools:
Process
If all the pieces are cut square and straight, life will be easy and virtually no racking will be needed to square the crate on the frame. The frames must be all square to angle. You need to keep track of the orientation of where you are working as the unit goes together. So, mark and make notes on the wood…it will all be inside and in the dark.
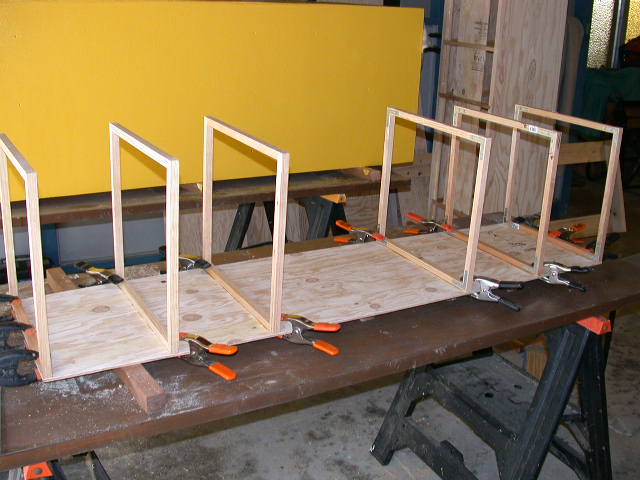
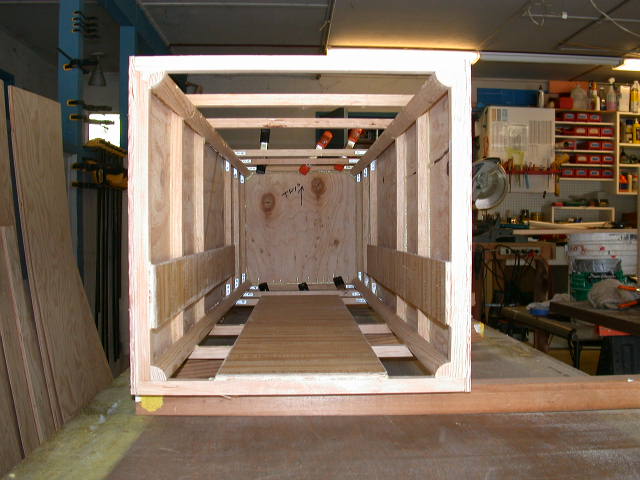
Starboard side: Mark the 15-7/8” side as such and where forward and up is. Mark the starboard side for the frames on both edges or use a 24” square. Clamp on all the frames to proper alignment. Study it. Are all the numbers correct and everything square? Run a pencil line down both sides of the frame to mark the side. Remove the frames, run a bead of glue within the frame marks and clamp in place. The clamps will move them till there is a good seat. Re-clamp till they are stable. Allow to cure and don’t rush it. There are no screws in the process. The open center section of the crate is to access the boat in the cradle near the frames of the cradle. This is the only place that foam support should be placed, as it will press downward on the boat where the molded keel can support the pressure.
Prepare 4 pieces of 3/4” quarter-round corner stock that will run the full length of the crate at the inside four corners of the frames, 61 inches. These will give longitudinal support to the structure. Clamp one on the frames where they are cured to the starboard skin on the bottom. Mark on both sides of the quarter-round where the frames are. Place a bit of glue inside the marked lines. Align and clamp this to one of the center frames on what will be the port side inside, dead on your marks. Now, gently move the frames to align with the other marks and clamp as you go. Dab on a bit more glue in the crevice with the frame. This process will properly align the frames identical to the glued side. Repeat the process for the other port side. Now, glue in the last two pieces of quarter round into the frame corners on the starboard side. Fuss with this to make sure it is right. This will square the frame so no racking will be needed later when installing the other skins. Allow these to cure.
The side skid plates for the cradle are 3” wide of ¼” ply and will be placed over the frames and up the side to center on the widest part of your cradle. Measure from the stern to and cover the #19 frame (about 42”). Make two. The base skid for the cradle is 8” wide. Make one.
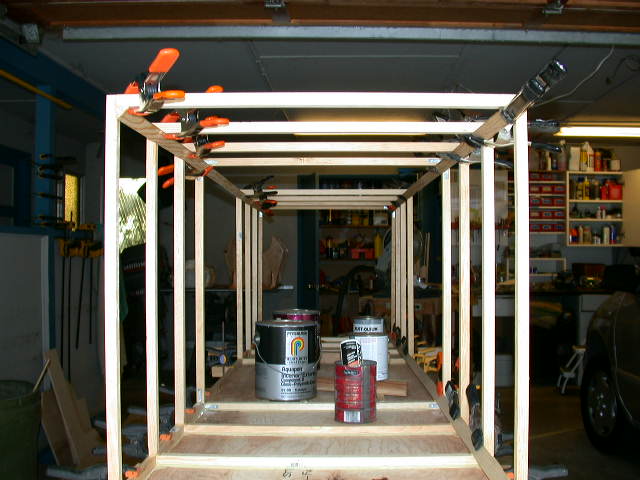
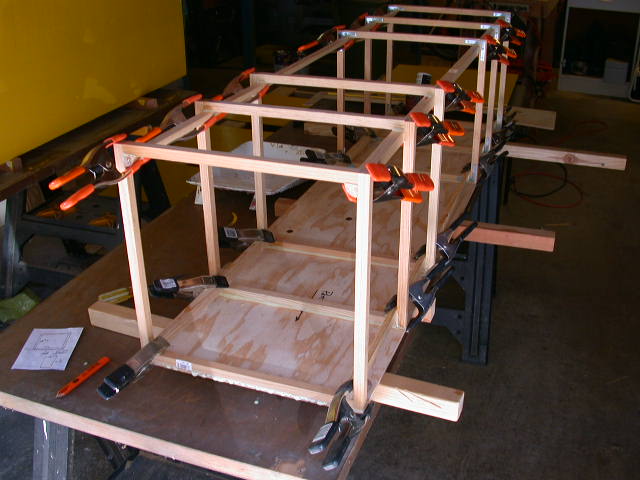
Place a piece of square stock centerline to the skid across the wide central section to support the skid. Place two more outside of this to support the starboard skin. Prepare additional square stock on the top and bottom of the side between the frames. These are to support the top and bottom skins at the corners and provide a place for the top screw inserts. Glue and clamp all these. Install the 3” wide skid with glue and weight it down for curing. Allow all this is to cure before proceeding.
Port side: Mark the side as such and where forward and up is. Complete the process above for the port side skin. Obviously, the quarter round has been installed and should align the frames to the port skin. So, all that is needed is to clamp on the skin, mark, glue and re-clamp. Put in the supports and install the port side skid. Allow all the new parts to cure.
When everything is cure hard, remove the clamps and sand with 60 grit to clean all the edges of glue.
Bottom: Align the bottom skin (16-1/16x61) carefully and clamp on the ends. Mark the frames for gluing. You will need to block the bottom side off the floor or table for clamping. Run a dry test of what procedure you will use. If you can borrow four to six 24” bar clamps, life will be easy. If not, filled paint cans, boat ballast or anything heavy will work.
When it all looks good, remove it all. Squeeze on the glue and carefully align the crate onto the bottom side. Clamp the ends. Weight down from the top of the crate onto the blocking till the bottom side is flush and mating to the side. Fret with this till all is well.
Prepare two pieces of square stock to run across the wide center section and support the base skid. Glue these in and then glue in the skid and weight it down as well. Allow all of this phase to cure well.
The Ends: Cut the bow and stern pieces to fit from the remainder of the 16-1/16” wide bottom skin that you saved. If you have maintained measurement control of the frames and used cabinet corner clamps to assemble them, no racking of the box will be needed. The end opening should be square. However, measure to make sure of the size needed. Remember, the ends will overlap the bottom and side skins but be flush with the frame at the top. The top pieces will overlap the ends…Okay? Think on it!
Install the bow end: Clamp on the piece to the top side of the frame for fit and mark the glue line inside. See how the skin is going to lay on the frame. If it is flat then some small finishing nails will hold it close during the gluing. If it is not then you might place the end on the floor and stand the crate on top and weight it. You might also try Duct tape to see if it will hold to the frame. Whatever you decide, glue it on and allow to cure. Then sand and clean the corners.
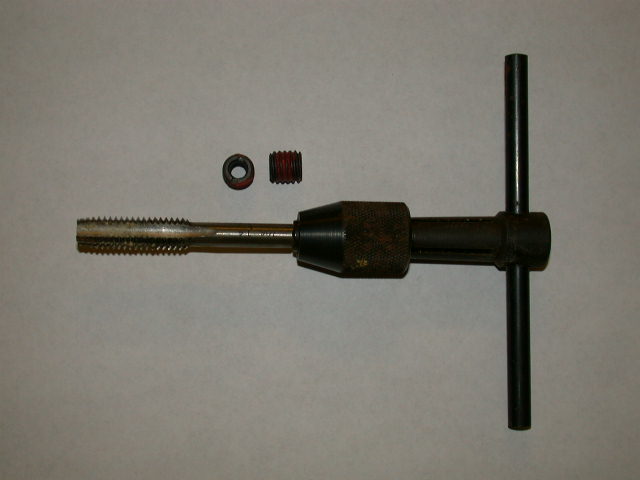
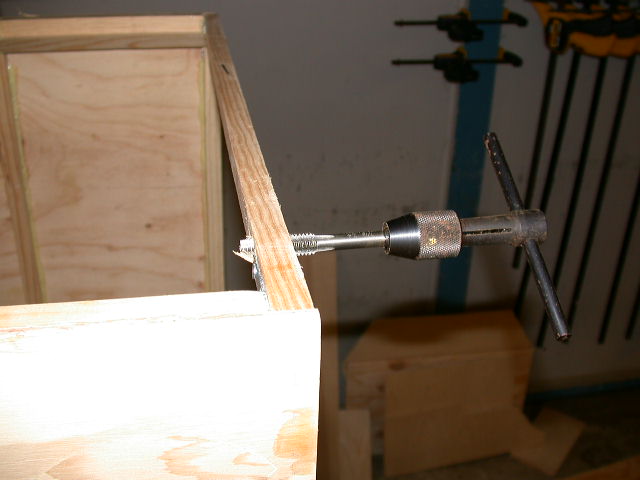
Install the stern end: Clamp on the piece flush with the top frame and tap the bottom to fit. Mark along the sides with a pieces of square stock a line to simulate where the frame is on the other side. Drill two pilot holes all the way through the end and the frame on both sides, dead center to the frame 3" from the top and 3" from the bottom. This is to miss the metal angle brace. Check the other side of the frame to make sure the hole is centered. Enlarge the holes on the end skin and the frame to 5/16" in stages. Remove the end piece and tap the holes in the frame with a 7/16-14 tap. Move slowly and carefully. There is not much room and the wood is delicate. Place a bit of CA glue on the inserts and thread them in the hole till flush with the frame. Install the end pieces with screws carefully not to break the bond till snug but not tight.
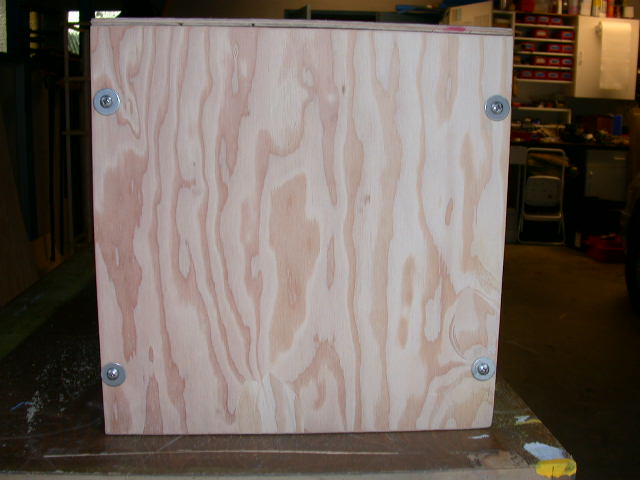
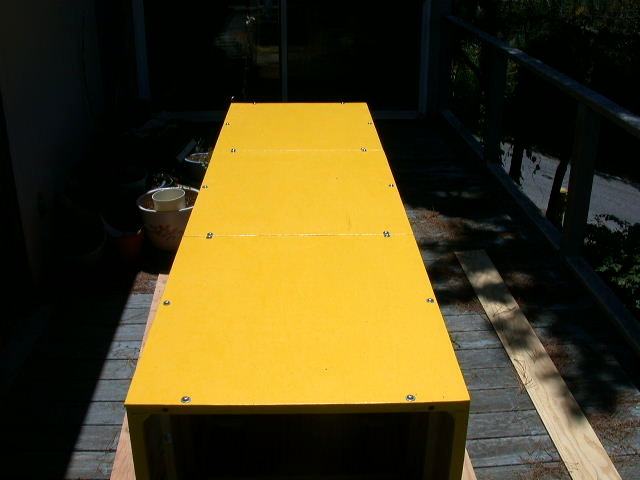
The top section: Cut the top from the 16-1/16" full sheet that you prepared earlier. Measure to cover the bow and stern ends. Mark the orientation on the underside so it will be installed in the same position in the future during use. Clamp to the end frames and tape where needed. Mark and drill like you did above for the inserts. Prepare the holes and install the inserts. Use whatever pattern you like but six will work with three on a side.
The photo here is a crate with two sections for an EC12. J crates use three sections. Whatever blows your skirt up...
Finishing: Close the crate with all sections fastened. Prepare a belt or palm sander with 60 grit and go to it. Oil stain or prime for painting. Stain or paint all the sections that are removable off the crate so there will be no sticking. When all this is cured hard, paint or install labels and markings to the shipper.
Handles: 6” handles are installed with additional ¼” ply backing where thought needed. The backing should have some glue to adhere to the location. It is suggested that machine screws be used rather than sheet metal screws. These should be backed with fender washers and Nylock nuts installed. You can place them where you like. It has been found here that it is handy if close enough that one person can span the reach.
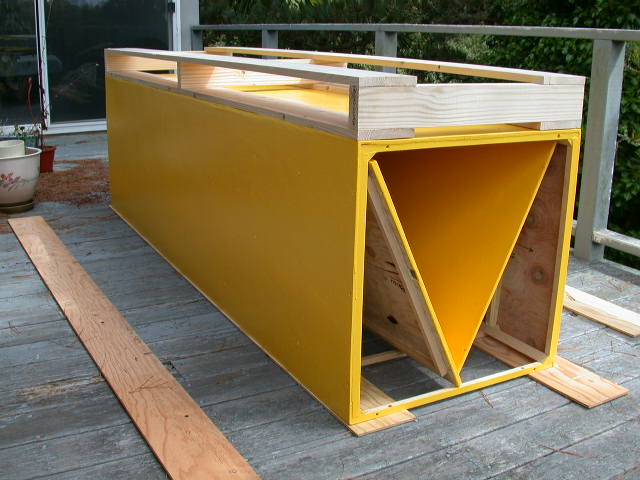
Forklift Friendly: Many shippers other than Greyhound require a crate to be set up for forklift movement. The following process is designed so that you can remove the gore when not in use. Likewise, the materials are not finished, generally low-grade and considered to be sacrificial and replaced as needed.
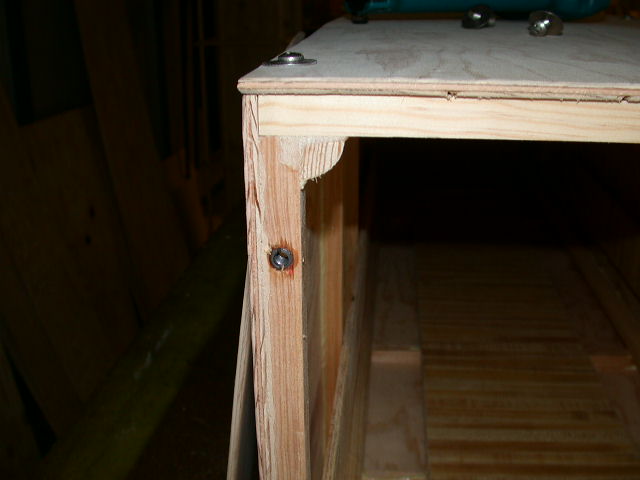
The crate is placed upside down on the table or floor. Two pieces of 2x4 are prepared for the ends. Two pieces of 1x6 are cut to 61-1/2” and aligned over the 2x4s. 2-1/2 drywall screws are used to attach these together. The unit is rotated onto the bottom of the crate. The unit is screwed into the crate at the ends and center section with 1-1/2 drywall screws. Be careful not to choose a screw location over an existing fastener. Screw in two more 1x6s over the 2x4s to finished the pallet like structure.
|