Last update, February 2, 2003
and
Installation of the Mainsail
Parts:
Crane, Mike Zellanack
Jumpers, Mike Zellanack
Spreaders, Mike Zellanack
3/8" dowel, Stock Item
#282 tang, quantity is your choice, Great Basin
#144 eye bolt, rigging, 3, Great Basin
#2 sheet metal screws, Stock Item
#2 wire sleeve swage, Berkley Fishing
3/32" pop rivets, if used
1/16" eye screw, if used
.018" SS wire, Stock Item Lone Star Balsa
#2 swage, Stock Item Berkley Fishing
Tools:
Drill or Dremel and bits.
Razor knife.
Needle to suit
Blue tape
Small hammer
Epoxy glue
Needle files
Cutters
Dremel cutting bit
#73 drill bit
Mini Saw
Small Visegrips
Wire cutters
#235, 3mm tap, Great Basin
Preparation Process Checklist
1. Cut the mast.
2. Install the base and pin.
3. Cut the slot for the crane.
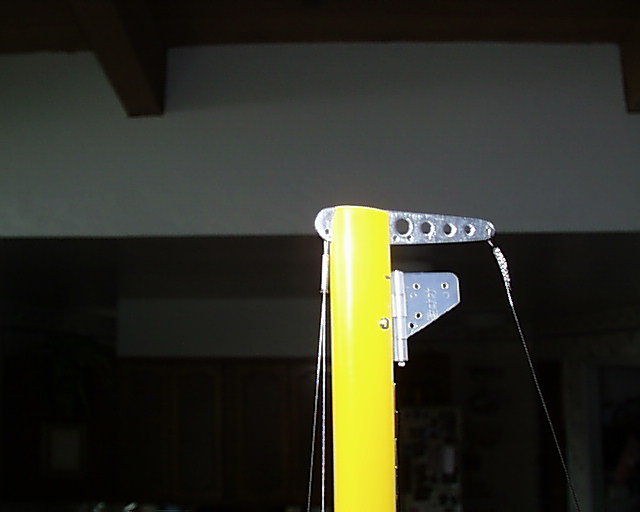
4. Install the headboard hinge, if you are using it. If you choose the line hinge, it will be installed after the mainsail is on the mast.
5. Install the crane.
6. Drill for the spreaders.
7. Prepare the insert holes for the upper and lower shroud wires. (Internal tang) or, install the external tangs.
8. Drill and install the forestay, bottom jumper and lower-lower shroud mounts.
9. Install the jumpers and their shrouds.
Cut down the Mast
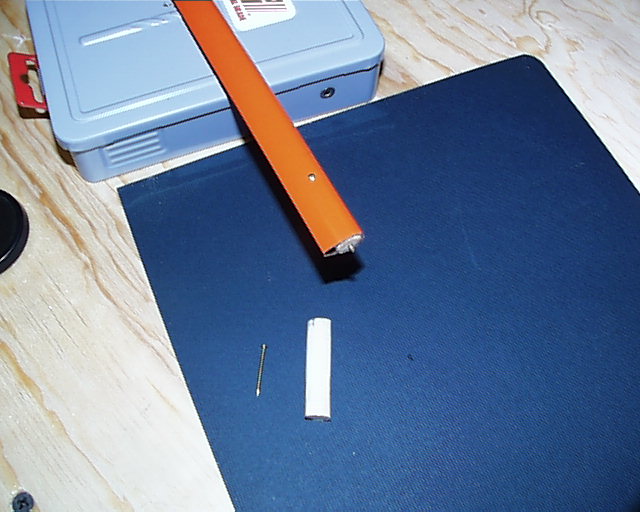
Cut the mast to 71-7/8 inches. The mini hack saw works great. Try to get the cut square.
Fashioned a 1" piece of 3/8" dowel with a knife or sander to fit in the base of the mast. Drilled a long hole in the center to receive the pin that will hold the mast on the step. An 18 gauge escutcheon works good but any nail will do. Be sure to leave only that needed to fit into the step so as not to puncture the deck skin. Install the base and drill for a small pin through the mast into the wood dowel. You can glue it in but a pin would allow you to replace the base if needed. A #51 bit is just fine for the escutcheon.
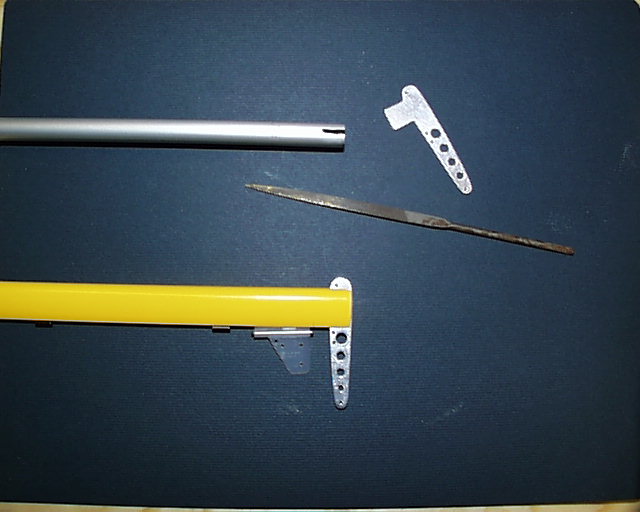
We cut the slot for the crane with a flat bladed needle file. It is slipped into the mast track, aligned to be straight and worked till the crane fits into it and flush with the top of the mast. Take your time so the sides of the cut will not enlarge more than needed. This should cause the crane to fit snug so no other means is needed to hold it there.

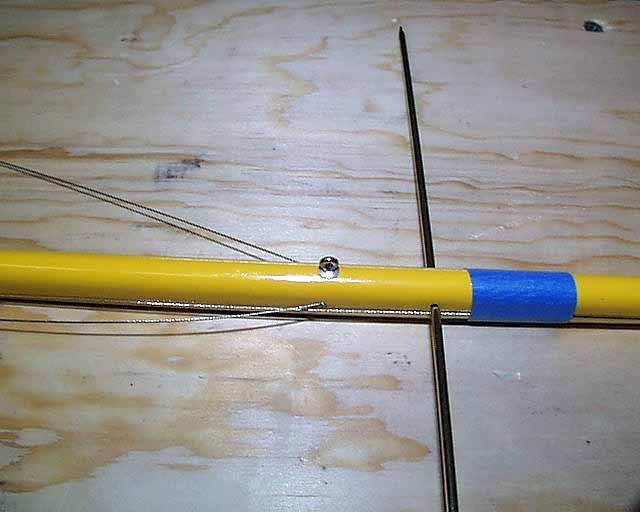
The spreaders have been selected at 33-1/8" from the base of the mast. Place some blue tape on both sides and mark where to drill. Drill the holes with a #51 bit. This is not as easy as it sounds. The small bit has a tendency to "walk" inside the mast before it grabs and penetrates the other side. This will leave you with an askew spreader. Insert the bit deep into the drill chuck so that the bit remaining is just enough to reach through both sides of the mast. If you can clamp or hold the mast flat on a piece of wood, it will help. When you go through the near side, take care to hold the drill in alignment and don't put a lot of pressure against the other wall. Going through should be a surprise. Test this on the piece of mast you have cut off till you have the touch.
Internal and External Mounting Tangs
Two Methods
Both methods function quite well. The internal tangs take more time to install and the external ones are high in aerodynamic drag. It is almost the "Bad and the Ugly."
The Internal Tang
Extra care is needed to provide an entry into the mast shell that will not fray or cut the shroud wire. A wire loop is crimped and trimmed for the inside of the mast with only the shroud showing on the outside. Very clean but it needs protection. The Dremel #9909 cutting bit is very suitable for cutting the exit area to allow the wire to "point" at the deck shroud rack. By doing so it lessens the stress on the wire.
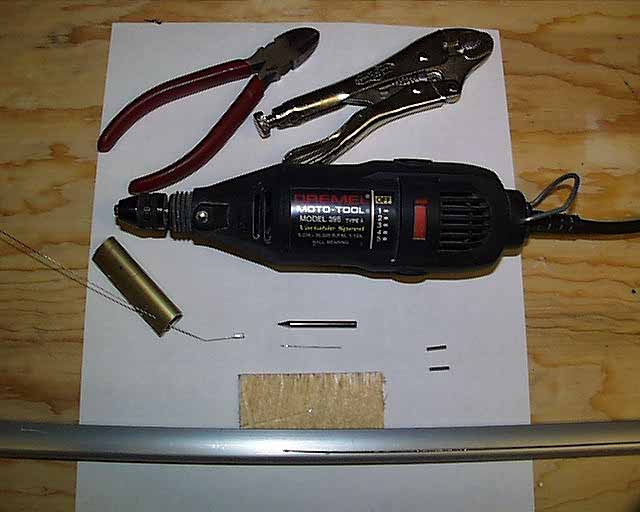
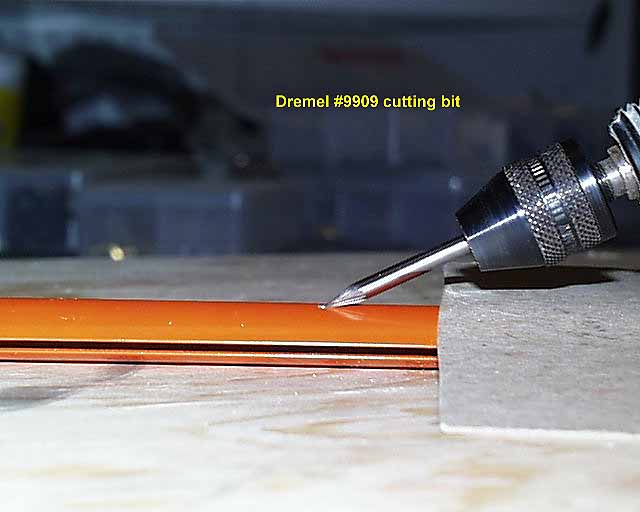
This angled cut is only to score the mast at the entry point and provide some purchase for the drill bit to cut through the aluminum. Mark the mast with a pin and place a piece of thin cardboard over the mast to protect the finish from the Dremel chuck. Then very carefully and lightly touch the mark with the tip of the bit working slowly to make a small groove angled toward the shroud rack. Practice on your piece of cut off mast. A light touch is needed so the bit will not walk away from the mark. When you are comfortable with this groove all four shroud exits while you have the bit in the Dremel.

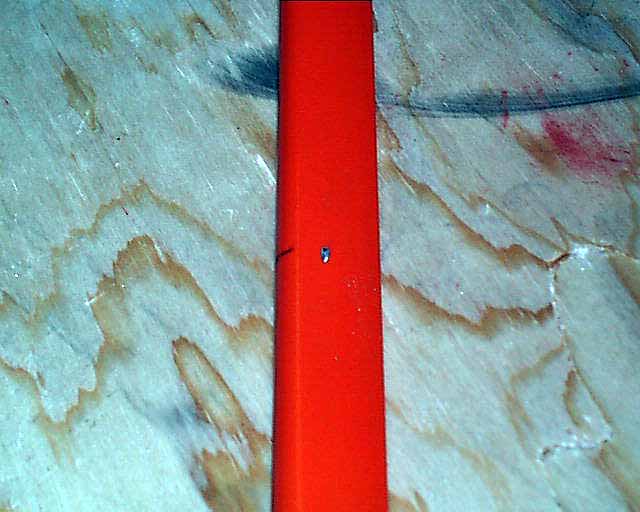
Install a #73 drill bit in the Dremel. Find the ledge the 9909 left and drill a hole at a slight steeper angle than before. Go easy at first till it feels solid and then apply more pressure to cut through. Cool the bit. Then put the bit back into the hole and lower the angle to deburr the hole. Move the bit around a little but not too much to break the drill. Good! That's it. The wire will be installed later but it will slide through the hole and out the top of the mast where the swage will be crimped.
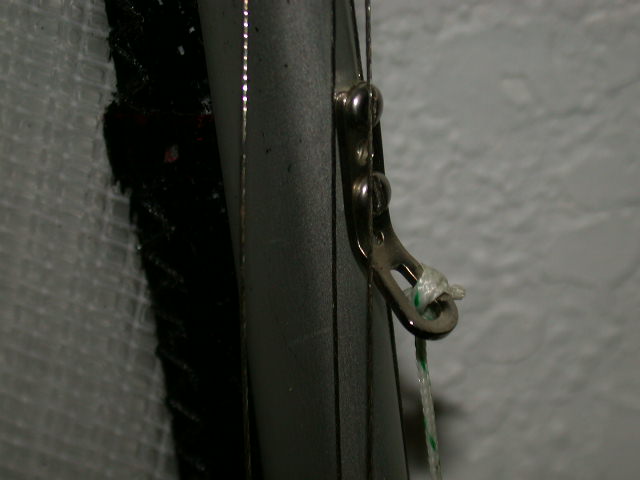
The External Tang
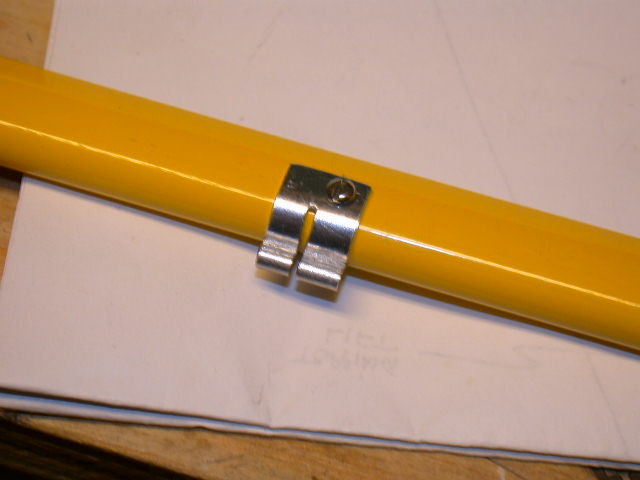
The Great Basin tang is installed with two #2 sheet metal screws. The position should be so that the wire connection will be adjacent to the mark. Bend the tang to match the angle needed before you attach it. A photo of a mounted tang is shown above for the forestay mount. Here again, if you need to determine the drill bit, test on the spare mast piece.
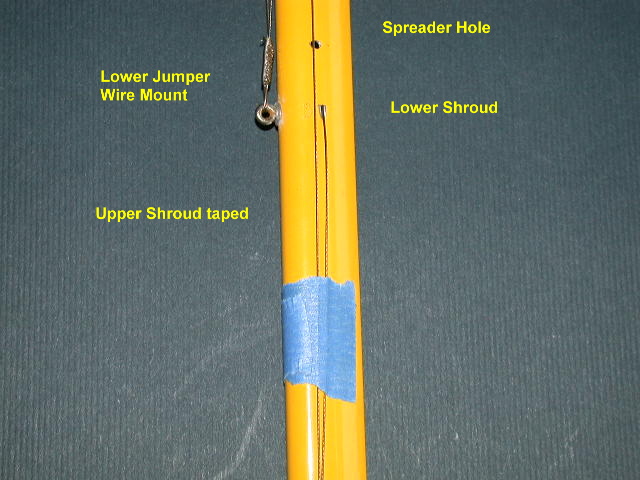

Upper and Lower Shroud Tang Positions
The upper shroud will be at 58-7/8" and the same as the jibstay. The lowers should be at 32" just below the spreaders.
The Jibstay, Lower Jumper and Lower/Lower Shroud Mounts
Methods, Eye Bolts or External Tangs
Tang
You can use the same Great Basin tangs as above. Mount then to the mast so the wire connection will be adjacent to the measurement on the mast.
Eye Bolt
These mounts are just now coming into use here (2002). They are easier to install than the pop rivet/eye screw mount and far more aerodynamic than the tang. The eye bolt mounting process is described on the Rigging Tips page.
The jibstay connection is at 58-7/8" at the same level as the upper shroud wire mounts. The lower mount for the jumper wires is the same as the lower shrouds at 32 inches. The mount for the lower/lower shrouds is at 4-1/2 inches. All of these are centered on the leading edge of the mast.
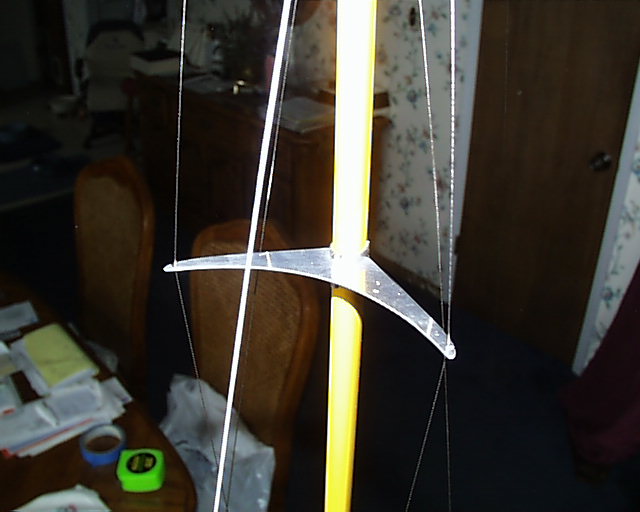

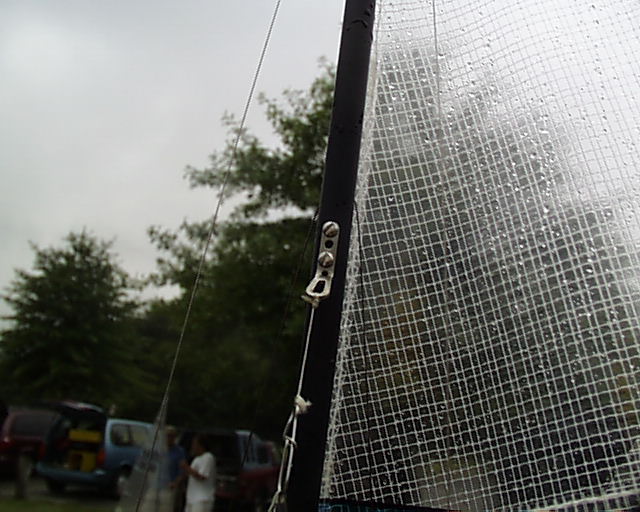
The jumper mount was installed so the spreader blade was at 52" above the deck with the #2 screws provided. Wire was threaded through the mast crane with equal ends at the lower attach point. The flared swage adjuster was then treaded up to the mast crane with the flared section down. The lower ends were threaded through a #2 Berkley swage then one end was passed through the port side of the mounting eyelet and the other through the starboard side. Both ends are now passed through the swage. The wire provided was around .012" and will pass through the #2 swage the four times needed.
To pre-tension the jumper wires, the mast was then laid, leading edge facing up, over two 1/8" dowels at both attach points and taped to the bench at the jumpers. This created a reverse bend to the mast. The ends of the jumper wires were then snuggled up, the swage moved down to the mounting eyelet and crimped. When finished, there should be an ever so slight forward bend to the mast, sometimes none but the tension is there. The eyelet mount process took about 20 minutes including the set up for the pre-bend.
Install the Upper and Lower Shroud Wires
Internal Tang
Slip the shroud wire through the prepared hole in the mast and continue till it comes out the top of the mast. If it hangs up on something and several tries does not work, twist (spin) the wire and it should pass the obstruction. Install an internal tang. Pull it into the mast until it is firmly seated at the hole in the mast. Cut the shroud wire off about 10" below the mast base.
Complete all four of the shrouds. Tape each side down along the mast so they will not get into the way. Be sure to keep the mast track clear.
External Tang
Install the shrouds to the tangs like you were making a rigging wire loop. Tape all the shrouds to the mast as above.
If you have not prepared the sail, you need to do that before you start here. Slide the sail hanks into the track on the mast. They will get a bit unruly as the jackline is not secure and will loosen during the process. It is best to do this on a table.
The line headboard hinge is installed now. If you are using the fixed hinge, just slide the hinge board into the headboard of the sail. You can put a paper binding clip on it or tape it to the crane to hold it in place.
This completes the Mast Section.