|
Last update, December 27, 2009
Supplier Internet Information
Parts:
Charged batteries for the TX and the
boat
Radio TX
Tools:
Razor knife
CA glue
Needle and thread
Page One of
Two
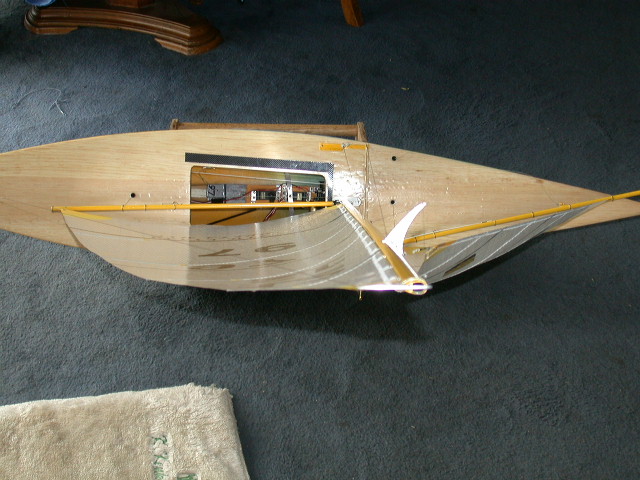
Standing the Rig
The procedure for standing the rig is
personal. It is a routine that you will do over and over. Hence, you will
develop your own system and organization. But for now, follow this process. The
purpose of this page is to get everything fitted to its place and put the sail
in working tune. Then when you go to the water things will be ready to go and in
their last settings. Standing the rig at the water will soon be a task of 15
minutes or less. However, today could be a long one but you will be getting your
first lesson in tuning.
-
Hook the backstay into
the deck mount.
-
Place the mast base into the center
hole of the mast step.
-
Hook the jib swivel line to the
center hole of the jib rack.
-
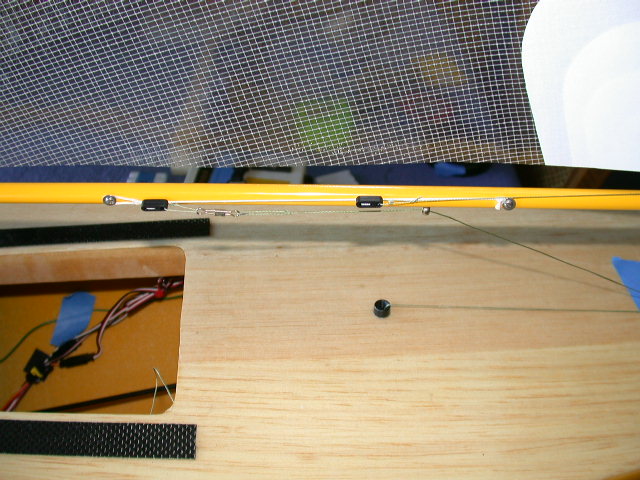
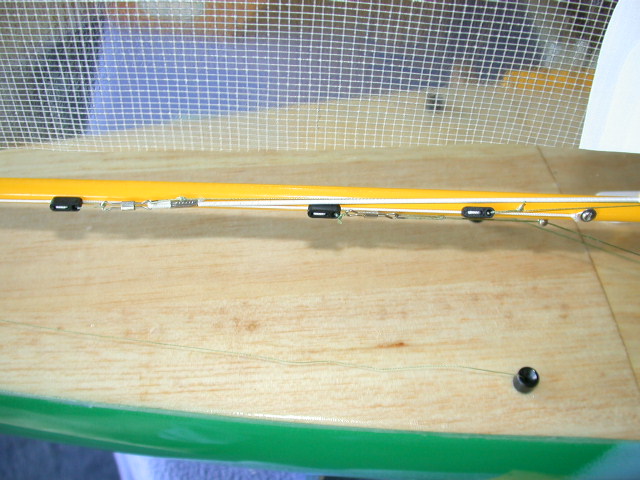
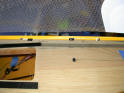
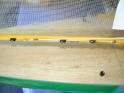
Snap the lower shroud clevis into the
#7 hole on the rack. That is two back from center (#5).
The rig will now stand alone
-
Install the spreaders and connect the
upper shrouds to the #5 hole on the shroud racks.
-
Run the loose jib and main sheetlines through the boom guide to the adjuster
connector.
-
Connect the topping lift bungee to
the adjuster connector.
-
Slide the jumper adjusting sleeve up
to the crane and connect the jumper wires to the jumper spreaders.
-
Firm up the main downhaul bowsie. Not
tight, just firm.
These are the basics
-
Turn on the radio system. Connect the
sheetline bungee. Run the winch to close hauled. Check that the jib trim control
is centered.
-
Size and connect the main sheetline.
Our tuning preference here is to have the main very near the centerline of the
boat at close hauled. While we practically never sail there, it is a starting
base that can be sometimes useful on the race course. Feed the line through the
sheetline guide to the adjuster. Set the adjuster about 2" from the forward
screw. Center the boom and mark the line with a fully extended CL connector. Tie
a Bowline loop to match that setting. Be sure before you set the knot. If you
make a mistake here and the knot cannot be undone, you will have to replace the
whole sheetline.
-
Size and connect the jib sheetline.
Follow the same procedure except that it is good to set the boom position
pointing at the front of the shroud rack. This will mean that the jib setting is
offset from the mainsail. This is true as the jib is very happy to be there.
This offset creates the slot to the main. The main provides the power and the
jib is the plug to the AC voltage regulator. No lie! You'll see! From here the
trim can close the slot shutting down the main in a heavy gust. From here the
trim can open the slot causing the boat to point up and scare the "Be Jesus" out
of your windward broadside captain. A properly rigged jib is fun and makes you
all warm inside.
-
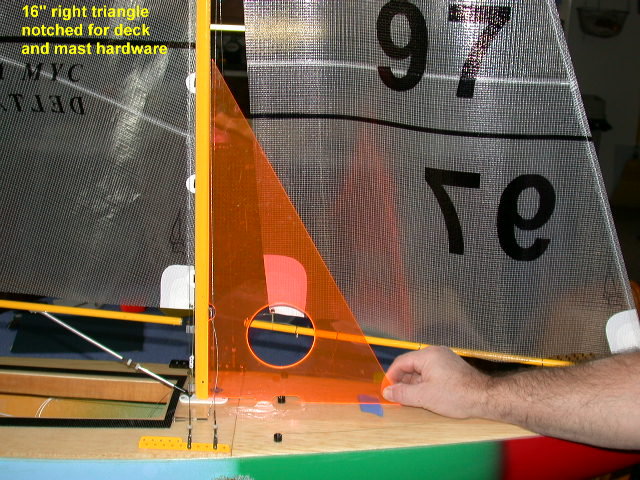
Okay...lets get on with it. Use a
triangle (16" or more in height) to check the mast. You want the mast to be
straight along this lower section. By loosening and tightening the jibstay
adjuster and the backstay, align it to the triangle. Put about 2 pounds of
tension on the backstay and check that the lower mast is still straight. Don't
worry with the top just yet.

-
Connect your mast divider device. If
you are using the one described on this site, clip it into the #1 holes on the
shroud rack. Lean it against the mast. Make sure that all four shrouds are not
tight; loose is good right now.
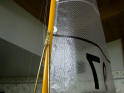
-
Center the mid
section of the mast with the lower shroud connectors. The divider
should be close to this spot. Centering is by loosening and tightening the lower
shrouds at the rack. As you do this the top of the divider will centered on the leading edge
as the mast moves. When you have this
centered, tighten the shrouds by rotating the clevis equal turns on each side.
You are looking for a dull "twang" as you strum the shrouds. If you have a
tension meter, this will be about 5 to 6 pounds. A meter is not needed for this
procedure. Learning the feel is a good thing. Check again that the divider is
still centered. Good.
-
Roll the boat
and cradle over on the high side of the cradle support. Sight down the mast. The
task here is to straighten and align the upper part of the mast with the lower.
Don't worry with bend yet, just the side to side alignment. Go through the same
procedure as above. Stand the boat upright once in a while to check that the
divider is still showing a straight lower mast. When the mast is straight,
athwartships, firm up the shrouds equally to a dull twang.
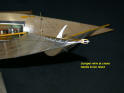
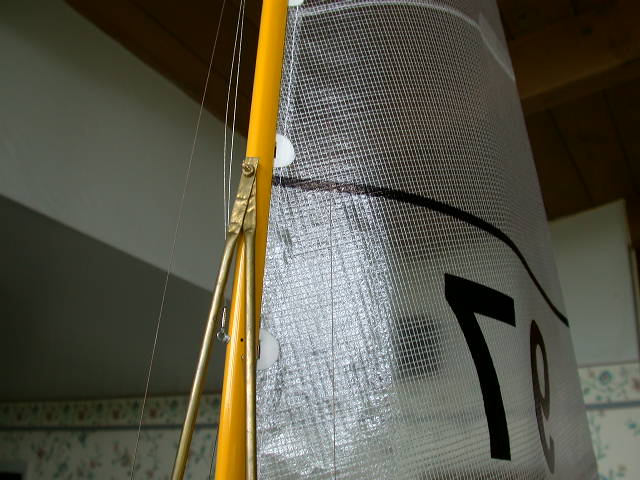
Note: A
characteristic of the jumper wires looping through the mast crane and being
secured near the spreaders is that the top of the mast can be biased by those
wires. You may bump the mast when moving the rig around and the centering at the
hole in the mast crane will reset. So, whenever, you see the upper part of the
mast off to one side, before you go adjusting things, hold the mast at the
spreaders and wiggle the top a bit. See if it centers.
Hint: When the
shroud connecters are set equally in the tuning process and locked with the lock
nut and the rubber tubing is in place, they should not move. Hence, each time
you stand the rig, it should be the same as it was removed. Whenever you see
something out of whack, look around first before you start changing things.
Are the jumper
wires in their right place and not one of the upper shrouds instead. NOoo, you
wouldn't do that!
Is one of the
upper shroud inside the jumper spreader.
Is the jumper
adjusting slider all the way up.
Is the
compression strut in place.
Are the shroud
connectors at the full length of the swaged loop.
Are the
shrouds in the same holes on both sides.
Is the mast
base pin seated.
You get the
idea...
-
Now we get to
the bend of the mast. If it is not perfectly straight it will be a concave
curve. This bend is fore and aft and the base setting will be that of the main
luff allowance (MLA) cut into the luff by the sailmaker. This means the bend
should match that cut. If it is 1/4", then you want to approximate that much bend.
Remember, you are doing base settings today, tweaking comes with fine tuning.
Additionally, here at DMYC, we set the upper shroud connections abeam the mast
step position and work the bend as discussed below. Again, this is a base as
there will be times when you are outside the envelope and innovative but
thinking actions are needed.
Naturally, the
backstay tension (BST) will introduce bend starting at the top of the mast. The
higher the tension, the greater the bend. BST is NOT a
means of controlling mast bend. BST settings are matched to sail design and wind
pressure. There are two main ways to control this bend for tuning; the lower shrouds and the jumper wire slider. Reduce bend in the center
of the mast by moving the lower shrouds aft on the rack. You can also increase
tension on the lowers to reduce bend when they are at an angle to pull on the
mast. To reduce bend in the upper portion of the mast, move the jumper wire
slider down.
Play with the BST
and the lower shrouds to understand the relationships to mast curves. Move the
mast for and aft with your fingers at the spreaders and watch the mast and the
sail shape change. The Controls page will get into the specifics of what will
happen to the sails with the many movements possible. After you finish playing,
set a nice gentle small bend into the mast.
Without getting into
the specifics of sail tuning, observe the forward portion of main. If you see a
nice smooth curve to the camber (across the width of the sail) then you are in
fat city. If you see a "knuckle" or "wave" in the surface of the sail this would
indicate that more bend is needed. Gently pull the mast forward and see if it
smoothes out. Pretend the lowers are the fingers on
the mast. They really are, you know.
Note: If at the beginning of this, you have a serious
bend at the base of the mast, it is likely to be the vang. This bend will be
from the base to a couple of inches above the boom. With settings given in the
assembly of the boom, there should be none caused by the vang. Make sure your
centerline setting of the boom has no downward force by the sheetline.
Disconnect the sheetline to make sure.
If this persists, unclip the lower shrouds and check.
If it persists, disconnect the vang from the boom. One of these two caused the
problem, over tightened lowers or a vang to long for the position. Loosen the
shrouds if it were they. Leave the vang disconnected if it caused the problem.
We will deal with it below.
RMG SmartWinch
-
Before getting
into the sail set, lets check and set the maximum boom movement. If you can
place the cradle on a box or table with the boat rolled over so the booms are
free to travel past the edge. It will be easier on the sheetline system and
your perspective of this procedure. The radio system should be on and the
winch close hauled with the sheetlines attached to the booms. The winch has
been played with so many times now that it is likely that neither of us
remembers where outhaul is calibrated. No matter, we will check and calibrate
as needed. Don't ask Vern! He has this glassy look about now.
If you have not been to the RMG page, you
might take a look here.
You will want the
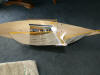
main to sheet out to about 85 degrees and the jib at 90. The view in the photo
is about right. Because the featured sheetline guide on the booms was
installed in a fixed location, this cannot be changed as part of tweaking. The
main and the jib will move together, however, the jib starts out offset and
should be close to what you are looking for. You should concentrate on the
main as a start and the jib will be maneuvered into place later.
Check that the
main is close to centerline, however, not so much that there is downward
tension on the boom. Check that the jib is offset and pointing at the forward
part of the shroud rack. Connect the sheetline bungee. Sheet out the winch all
the way. If the drum turns till the hole and the line are pointing forward,
meaning there are no turns on the drum, the winch is calibrated to maximum
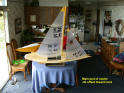
turns. Its okay. So, sheet in till the main looks like that in the photo.
What you are
looking for in the jib is that she is close to 90 degrees with the trim
centered. It would also be nice if the trim range will be from 85 to 95
degrees. The DMYC trim servo set up will produce the range from center. If the
jib is not at 90 degrees, even with a couple of clicks on the TX, then it will
have to be trimmed to 90 degrees and you should note the control position on
the TX. That will be the base setting. Before you finish check the main
position at close hauled to be like that in the photo. That to is a base for
this calibration as one effects the other.
Play with this
till you understand the relationships. Get a visual of where the main is to go
at full sheet out. Now, re-calibrate the winch programming. The visual for the
main is what you want in step 16. Turn off the TX and you will get three beeps
acknowledging the setting is saved. Finish the programming steps as needed.
Now, turn the
system back on and check your sheeting positions for close hauled and full
sheet out. Are you happy? Good, you are done with that. Put the boat and
cradle back on the floor.
-
Set the camber
of the sails. The camber is the sweeping curve of the sail from the luff to the
leech. There are a lot of things you can do with the camber but all that will be
covered later in Controls. During this initial tuning sessions you will want a
general setting of the depth of that camber. There is a general rule that works
very well and will move the boat in the water in nearly all conditions. That is
"Two fingers on the jib and three on the main." Adjust the clew lines till you
can place two fingers between the jibsail and the boom and three in a like
manner on the main. View this setting from the top of the mast to see that it is
a smooth flowing curve.
Please continue on *Page
Two* with item 20
Top of
Page |